
Gardening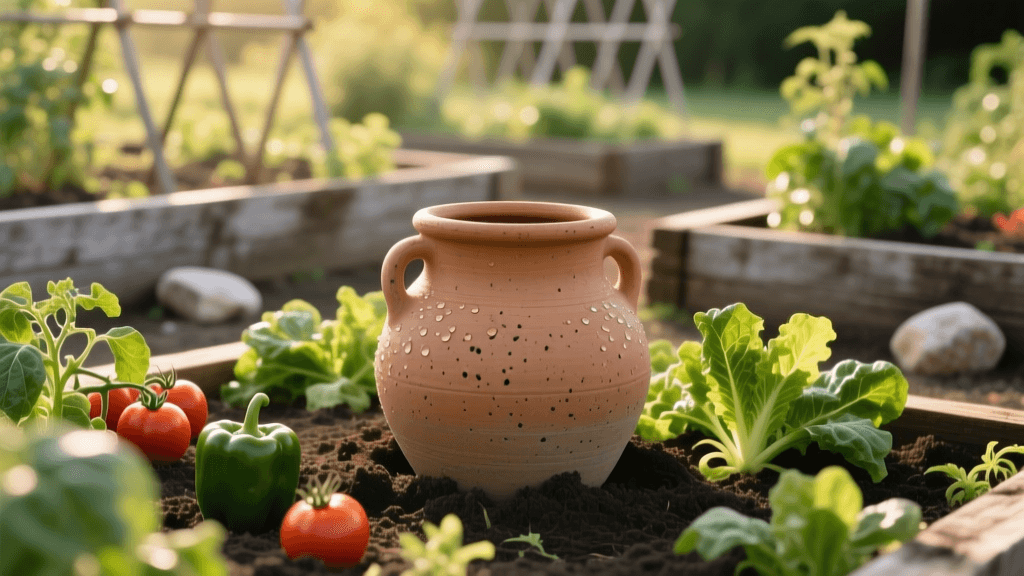
Olla Irrigation for Raised Beds: A Drought-Proof Guide
The Drought Challenge in Modern Vegetable Gardening
As climate patterns shift and municipal water restrictions become more frequent, home gardeners are increasingly tasked with doing more with less. Traditional overhead watering and even standard drip lines can lose massive amounts of moisture to surface evaporation and wind drift. According to the EPA WaterSense program, outdoor water use accounts for nearly 30 percent of total household water consumption, and in arid regions, this number can exceed 60 percent. For vegetable gardeners relying on raised beds—which naturally drain faster than in-ground soil—maintaining consistent moisture during a drought is a daily, expensive struggle.
Enter the Olla (pronounced "oy-yah"). This ancient, unglazed terracotta vessel offers a brilliant, zero-electricity, gravity-and-tension-based irrigation solution. By burying these porous clay pots directly in the root zone of your raised beds, you can reduce water usage by up to 70 percent while delivering hydration exactly where the plant needs it most. Conservation advocates like Water - Use It Wisely consistently highlight subsurface irrigation as a premier method for eliminating evaporation, and the humble olla is the most accessible way to achieve this in a home garden setting.
The Science of Subsurface Clay Pot Irrigation
The magic of the olla lies in soil physics, specifically a concept known as matric potential or soil moisture tension. An unglazed terracotta pot is porous, featuring microscopic holes that allow water to pass through. However, the water does not simply leak out continuously. Instead, the release of water is dictated by the surrounding soil's moisture level.
When the soil around the olla dries out, the plant roots create a suction effect (tension) that pulls water molecules through the clay walls. When the soil is adequately moist, the tension equalizes, and the water stops seeping. This means an olla is essentially a self-regulating, analog irrigation computer. It prevents both underwatering during heatwaves and overwatering during unexpected rainstorms, virtually eliminating the risk of root rot and fungal diseases that thrive on wet foliage.
System Comparison: Ollas vs. Drip vs. Soaker Hoses
While the USGS Water Science School notes that modern micro-irrigation techniques like drip lines have revolutionized agricultural water conservation, ollas offer unique advantages for the small-scale, off-grid, or heavily restricted urban raised bed gardener. Below is a comparison of common raised bed irrigation methods.
| Irrigation Method | Water Efficiency | Upfront Cost (per 4x8 bed) | Maintenance Level | Weed Germination |
|---|---|---|---|---|
| Unglazed Ollas | 90-95% (Subsurface) | $40 - $80 (3 vessels) | Low (Refill every 3-5 days) | Very Low (Dry surface) |
| Drip Tape / Lines | 75-85% (Surface/Sub) | $30 - $50 | High (Clogs, UV degradation) | Moderate (Wet surface spots) |
| Soaker Hoses | 60-70% (Surface) | $20 - $35 | Moderate (Uneven pressure) | High (Wet surface) |
| Overhead Sprinkler | 30-50% (Evaporation) | $15 - $30 | Low | Very High (Wet surface) |
Step-by-Step Installation Guide for a 4x8 Raised Bed
To properly outfit a standard 4-foot by 8-foot raised bed, you will need three 2-gallon to 3-gallon unglazed terracotta ollas. Commercial options like GrowOya or Dusa cost between $20 and $40 each, but you can also source generic unglazed clay pots from local nurseries.
1. Spacing and Placement
Ollas typically have an effective hydration radius of 18 to 24 inches, depending on your soil's clay and sand content. Sandy soils wick water poorly, reducing the radius to about 12 inches, while loamy, compost-rich soils will pull water up to 24 inches away.
- Place three ollas down the center line of your 4x8 bed.
- Space them exactly 2.5 feet apart, leaving 1.5 feet of space from the head and foot of the bed.
- Ensure the neck of the olla sits 1 to 2 inches above the soil line to prevent surface runoff and dirt from washing into the reservoir.
2. Backfilling and Initial Soaking
Do not fill the olla with water before burying it, as it will become incredibly heavy and difficult to position. Instead, dig your hole, set the dry olla in place, and gently backfill the surrounding soil, tamping it down firmly to eliminate air pockets. Air gaps will break the capillary action required for water to move from the clay to the soil. Once packed, fill the olla to the brim and let it soak the surrounding soil for 24 hours before planting.
3. Capping the Vessels
Always use a tight-fitting lid. Commercial ollas come with clay or plastic caps. If using a DIY pot, use a flat stone, a terracotta saucer, or a cork stopper. This is non-negotiable, as open water sources will attract mosquitoes, evaporate rapidly, and allow debris to clog the interior pores.
How to Make Your Own DIY Ollas
If you are on a strict budget, you can manufacture highly effective ollas using standard garden center supplies for roughly $8 per unit.
- Purchase two identical unglazed terracotta pots (e.g., 8-inch diameter).
- Buy a tube of 100% waterproof silicone sealant (ensure it is aquarium-safe or non-toxic once cured).
- Apply a generous bead of silicone to the rim of one pot.
- Press the second pot upside down onto the first, sealing the drainage holes together to create one large, enclosed sphere.
- Allow the silicone to cure for 48 hours.
- Leave the top drainage hole open—this becomes your fill hole. Plug it with a wine cork or a small piece of closed-cell foam when not filling.
Crop Selection and Spacing Layouts
Because ollas provide deep, consistent moisture, they are best suited for heavy-feeding, deep-rooted crops. Shallow-rooted plants may struggle to reach the moisture wicking from the vessel unless planted directly on the edge of the olla's radius.
Best Crops for Olla Irrigation (Plant within 12-18 inches)
- Tomatoes (Indeterminate): Plant 2 tomato plants per olla. Their deep taproots will wrap around the clay, drawing massive amounts of hydration.
- Peppers and Eggplants: Plant 3 to 4 around the perimeter of the vessel.
- Squash and Zucchini: Plant 2 hills of squash per olla. The broad leaves will shade the soil, further reducing ambient evaporation.
- Deep-Rooted Herbs: Rosemary, thyme, and oregano thrive on the consistent, moderate moisture.
Crops to Avoid or Interplant Carefully
- Lettuce and Spinach: These have shallow root systems. Plant them on the outer edges of the 24-inch radius where they can catch the furthest reaches of the wicking moisture, or rely on light surface watering for germination.
- Carrots and Radishes: Direct-sown root vegetables require consistent surface moisture to germinate. Ollas do not wet the top inch of soil. You will need to hand-water the surface until seedlings are established.
Amplifying Efficiency with Soil Amendments
An olla is only as effective as the soil it sits in. To maximize the capillary draw (matric potential), your raised bed soil must be rich in organic matter. Incorporate biochar and vermicompost into your raised bed mix. Biochar acts like a microscopic sponge, holding onto water and nutrients and bridging the gap between the clay pot and the plant roots. Top the bed with 2 to 3 inches of arborist wood chips or straw mulch. While the olla prevents surface evaporation from the soil itself, mulch keeps the ambient soil temperature cool, protecting the delicate root hairs that connect to the clay vessel.
Seasonal Maintenance and Winterization
Unglazed terracotta is fragile when subjected to the freeze-thaw cycle. If you live in a climate where winter temperatures drop below 32°F (0°C), you must winterize your ollas to prevent them from cracking and shattering.
"The longevity of an unglazed clay irrigation vessel depends entirely on how well it is protected from freezing water expansion. A single night of hard freezes can turn a $40 olla into expensive gravel."
In late autumn, after pulling your spent vegetable crops, empty the ollas completely. Use a turkey baster or a wet-dry vac to suck out the last inches of water at the bottom. If you have the space, dig them up, scrub the exterior with a stiff brush and white vinegar (to remove mineral deposits and algae that clog the pores), and store them in a garage or shed. If digging them up is too labor-intensive, leave them buried but stuff the interior tightly with dry straw or leaves, and cap them securely. This insulation provides a buffer for any residual moisture that might freeze.
By integrating ollas into your raised bed garden, you transition from a reactive waterer to a proactive water manager. You will spend less time dragging hoses across the yard, lower your municipal water bill, and provide your vegetables with the steady, stress-free hydration they need to produce record-breaking yields, even in the heart of a summer drought.

