
Landscaping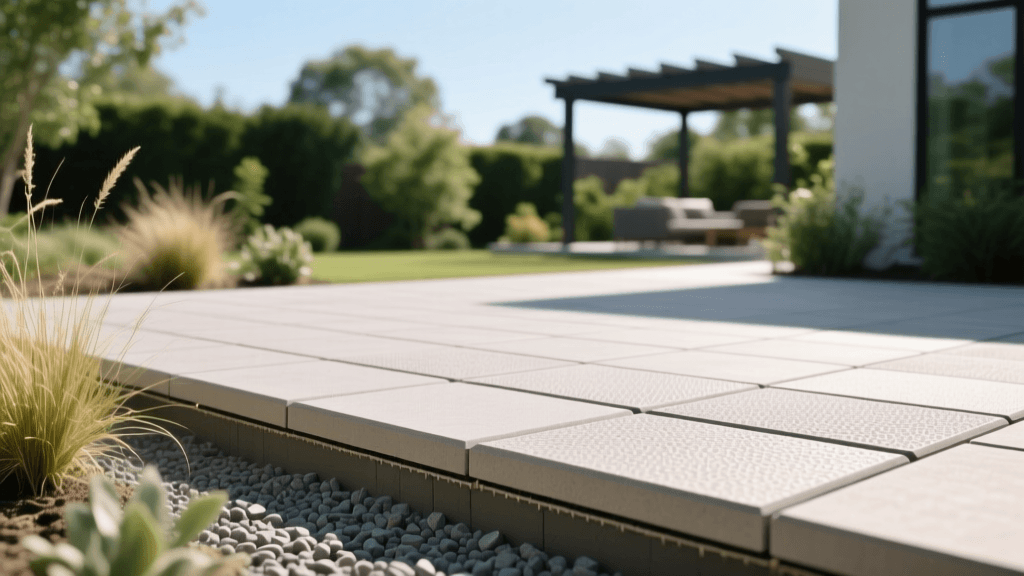
Expert Tips for Permeable Paver Patio Installation
The Shift Toward Sustainable Hardscaping
As homeowners and landscape architects increasingly prioritize sustainable landscaping, permeable paver patios have emerged as a premier solution for managing stormwater runoff. Unlike traditional concrete or standard interlocking pavers, permeable interlocking concrete pavement (PICP) is designed to capture, filter, and slowly infiltrate rainwater directly into the underlying soil. According to the Environmental Protection Agency (EPA), green infrastructure practices like permeable pavements significantly reduce the burden on municipal storm sewers, mitigate local flooding, and filter out pollutants such as heavy metals and oils before they reach groundwater aquifers.
However, installing a permeable patio is vastly different from laying a standard paver patio. The structural integrity and hydrological performance of the system rely entirely on the use of open-graded aggregates and precise compaction techniques. In this comprehensive guide, we will explore the expert tips and best practices for designing and installing a permeable paver patio that lasts for decades while keeping your yard dry and ecologically balanced.
Essential Materials: Ditch the Sand
The most common mistake DIYers and inexperienced contractors make when attempting a permeable installation is using traditional bedding sand and jointing sand. Sand retains moisture, clogs easily, and completely defeats the purpose of a permeable system. Instead, you must use open-graded, washed crushed stone. The Interlocking Concrete Pavement Institute (ICPI) strictly mandates specific ASTM-designated aggregates for each layer of a PICP system to ensure adequate void space for water storage and infiltration.
- Geotextile Fabric: A non-woven separation fabric is required at the soil interface to prevent subgrade soil from migrating up into the stone reservoir and clogging the system.
- Sub-Base and Base Stone: Washed, open-graded crushed rock (typically ASTM No. 2 or No. 57) that provides structural support and a massive reservoir for water storage.
- Bedding Stone: Smaller washed stone (ASTM No. 8) that creates a level surface for the pavers while allowing water to pass through.
- Jointing Stone: The smallest aggregate (ASTM No. 89) used to fill the wide joints between the pavers, locking them in place while maintaining surface permeability.
- Edge Restraints: Rigid plastic or concrete curbs secured with spikes, designed with weep holes or placed above the bedding layer to allow lateral water drainage.
Step-by-Step Installation Best Practices
1. Site Evaluation and Soil Infiltration Testing
Before excavating, you must understand your soil's drainage capacity. Conduct a simple percolation test by digging a test hole 12 inches deep, filling it with water, and measuring the drop in water level over one hour. If your soil is heavy clay with an infiltration rate of less than 0.5 inches per hour, the ICPI recommends installing a perforated underdrain pipe at the base of the aggregate reservoir, connected to a daylight exit point or a dry well. Furthermore, ensure the patio surface slopes away from the home's foundation at a minimum grade of 1% (a 1-inch drop per 8 feet) to encourage surface overflow during extreme deluge events.
2. Excavation and Subgrade Preparation
Calculate your total excavation depth by adding the thickness of the paver (usually 2 3/8 or 3 1/8 inches), the bedding layer (2 inches), the base layer (4 to 6 inches), and the sub-base layer (4 to 8 inches, depending on soil bearing capacity and expected load). For residential patios, a total depth of 12 to 16 inches is standard. Excavate the area, ensuring the subgrade soil is left uncompacted and rough to promote downward water infiltration. Lay the non-woven geotextile fabric over the exposed soil, overlapping seams by at least 18 inches and folding the excess up against the edges to create a bathtub effect that prevents soil intrusion.
3. Building the Aggregate Reservoir
Begin adding your base and sub-base aggregates (ASTM No. 57 or No. 2). Expert contractors never dump and spread all the stone at once. To achieve the necessary structural density without crushing the stones, spread the aggregate in 4-inch lifts (layers). Compact each lift using a low-amplitude, high-frequency vibratory plate compactor. Because open-graded stone lacks fine particles, it will not lock up like traditional gravel base; instead, the mechanical compaction forces the angular faces of the stones to interlock, creating a highly stable, porous matrix.
4. Screeding the Bedding Layer and Laying Pavers
Spread a uniform 2-inch layer of ASTM No. 8 bedding stone over the compacted base. Use standard screed rails and a straight edge to level the stone. Do not step on or disturb the screeded bedding layer. Begin laying the permeable pavers according to your chosen pattern, starting from a fixed corner or edge. Permeable pavers feature integral spacer bars on their sides that automatically create the wide joints necessary for the No. 89 jointing stone. Maintain straight lines and avoid dragging the pavers across the bedding stone, which can displace the level surface.
5. Jointing and Final Compaction
Once the field is laid and cut pavers are fitted along the edges, install your rigid edge restraints. Next, broadcast the ASTM No. 89 jointing stone across the entire patio surface. Use a push broom to sweep the stone deeply into the joints. Run your vibratory plate compactor over the patio in multiple directions to vibrate the jointing stone down to the bottom of the pavers. Add more jointing stone and sweep again until the joints are completely filled to within 1/8 inch of the paver surface. This final step locks the pavement together into a unified, flexible, and permeable mat.
Aggregate Sizing Chart for Permeable Systems
Adhering to precise aggregate sizing is non-negotiable for a functional PICP system. The following table outlines the standard layer specifications recommended by the ICPI for residential pedestrian applications.
| System Layer | Material Type | ASTM Designation | Typical Depth | Primary Function |
|---|---|---|---|---|
| Sub-Base (Optional) | Open-graded crushed stone | No. 2 or No. 3 | 4 - 8 inches | Deep water storage reservoir |
| Base | Open-graded crushed stone | No. 57 | 4 - 6 inches | Structural support and storage |
| Bedding | Open-graded small stone | No. 8 | 2 inches | Leveling course for pavers |
| Jointing | Open-graded tiny stone | No. 89 | 2 3/8 inches (Full depth) | Surface infiltration and locking |
Expert Maintenance Guidelines
A permeable patio is not an install-and-forget project; it requires specific maintenance to ensure the void spaces do not become clogged with sediment, leaves, or organic matter. The EPA notes that routine maintenance is critical to preserving the long-term infiltration rates of green infrastructure.
- Routine Sweeping: Use a stiff push broom or a specialized outdoor vacuum sweeper to remove autumn leaves, pine needles, and wind-blown dirt. Never use a standard leaf blower on a high setting, as it can blow the jointing stone out of the crevices.
- Winter De-icing: Never apply sand, cinders, or clay-based ice melts to a permeable patio. These materials will instantly clog the surface voids. Instead, use a high-quality, chloride-based ice melt (like calcium chloride) sparingly, or rely on mechanical snow removal with a plastic-blade snow shovel or a snowblower with the skid shoes raised slightly above the surface.
- Deep Cleaning: Every 3 to 5 years, or if you notice water pooling on the surface during heavy rain, hire a professional to perform a vacuum-sweeping and power-washing extraction service. This process removes embedded fines from the top inch of the jointing stone, instantly restoring the patio's original infiltration capacity.
"The success of a permeable interlocking concrete pavement system relies entirely on the purity of the open-graded aggregates. Introducing even a small amount of fine sediment or sand during construction will compromise the hydrological performance and lead to premature surface ponding."
— Interlocking Concrete Pavement Institute (ICPI) Technical Specifications
Conclusion
Installing a permeable paver patio is an investment in both your property's aesthetic appeal and its environmental resilience. By abandoning traditional sand-setting methods and embracing the rigorous, engineered approach of open-graded aggregate bases, you create a stunning outdoor living space that actively manages stormwater. Follow these expert best practices, adhere to ICPI guidelines, and your permeable patio will provide a durable, eco-friendly foundation for your landscape for decades to come.

