
Landscaping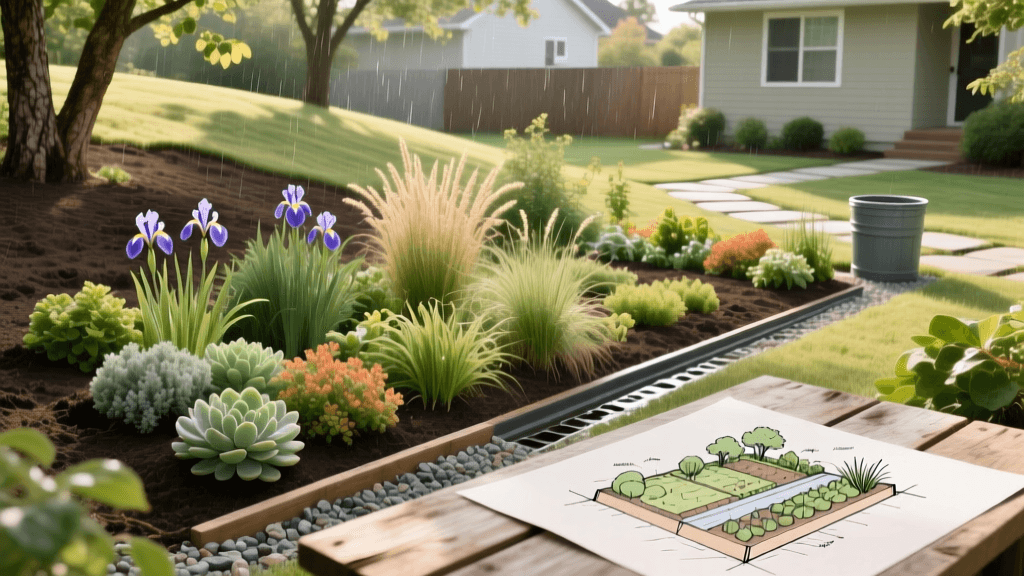
How to Plan a Rain Garden: Design, Plants, and Cost
The Strategic Value of Rain Garden Design
Stormwater runoff is one of the leading causes of urban water pollution and residential foundation damage. According to the United States Environmental Protection Agency (EPA), runoff from just one inch of rain on a typical 2,000-square-foot roof generates over 1,200 gallons of water. Planning a rain garden is a highly effective, sustainable landscaping strategy designed to capture, filter, and slowly absorb this runoff into the ground. Unlike a traditional water feature or a bog, a well-designed rain garden is meant to hold water temporarily, usually draining completely within 24 to 48 hours to prevent mosquito breeding.
Designing a rain garden requires careful planning regarding topography, soil composition, and hydrology. This comprehensive guide will walk you through the exact measurements, soil engineering ratios, plant zoning strategies, and budget considerations needed to plan a functional and aesthetically pleasing rain garden for your front or backyard.
Step 1: Site Selection and Hydrology Planning
The success of your rain garden hinges entirely on its placement. You are looking for a natural depression or an area where you can safely divert water from your downspouts, sump pump discharge, or driveway.
Placement Rules of Thumb
- Distance from Foundation: Always locate the garden at least 10 feet away from your home foundation to prevent water seepage into your basement or crawlspace.
- Distance from Septic Systems: Keep the garden at least 15 feet away from septic drain fields to avoid overloading the system.
- Utility Lines: Always call 811 before you dig to ensure you are not excavating near underground gas, water, or electrical lines.
- Slope Considerations: Ideal sites have a gentle slope of 1% to 10%. If the slope is steeper than 10%, you will need to build a reinforced berm or consider a terraced bioretention design.
The Percolation Test
Before finalizing your design, you must test the soil drainage capacity. Dig a test hole 12 inches deep and 6 inches wide. Fill it with water and let it drain completely to prime the soil. Then, fill it a second time and measure how many inches the water drops per hour. If the water drops less than 0.5 inches per hour, your native soil has too much clay. In this scenario, you must either heavily amend the soil with coarse sand or install a perforated PVC underdrain pipe (4-inch diameter) at the base of a gravel layer, daylighting it to a lower elevation on your property.
Step 2: Sizing and Excavation Specifications
A common mistake in landscape planning is building a rain garden that is too small for the volume of water it needs to handle. A standard residential rain garden ranges from 100 to 300 square feet.
Calculating the Catchment Area
To determine the size, calculate the square footage of the roof area that drains into the target downspout. For example, if a 500-square-foot section of your roof drains into one downspout, and you want to capture 1 inch of rainfall, you need a garden that can hold roughly 310 gallons of water. A garden measuring 10 feet by 15 feet (150 sq ft) with a 6-inch depression will hold approximately 560 gallons, providing a safe overflow buffer. If you are also capturing runoff from a 400-square-foot impermeable driveway, add this to your total catchment area. Driveway runoff often carries motor oil and heavy metals, making the bioretention filtering capacity of your rain garden even more critical.
Excavation Depth and Berm Construction
Excavate the basin to a depth of 6 to 8 inches. The bottom should be completely level to ensure water distributes evenly rather than pooling in one corner. Use the excavated native soil to build a berm on the downhill side of the garden. The berm should be 6 to 12 inches high, 2 feet wide at the base, and tamped down firmly to prevent breaching during heavy storms.
Step 3: Soil Engineering and Amendment
Native soil is rarely ideal for a rain garden. Heavy clay holds water too long, while pure sand filters it too quickly, failing to remove pollutants. According to guidelines published by the Rutgers Cooperative Extension Water Resources Program, the optimal bioretention soil mix (BSM) should balance drainage with nutrient retention.
According to the Rutgers Cooperative Extension, a properly constructed rain garden can reduce the volume of stormwater runoff entering local waterways by up to 30%, while simultaneously removing heavy metals, nitrogen, and phosphorus through biological filtration.
The Ideal Rain Garden Soil Mix
| Component | Percentage by Volume | Purpose |
|---|---|---|
| Coarse Washed Sand | 60% | Ensures rapid drainage and prevents compaction. |
| Native Topsoil | 20% | Provides structure and mineral content. |
| Leaf Mold or Compost | 20% | Retains moisture, supports microbial life, and filters pollutants. |
Mix these components thoroughly before backfilling the excavated basin. Leave a 2-to-3-inch gap at the top of the basin to allow for a layer of mulch and temporary water pooling.
Step 4: Zoning and Plant Selection
A rain garden features three distinct microclimates, or zones, based on moisture levels. Planning your plant layout according to these zones is critical for long-term survival and curb appeal.
Rain Garden Plant Zoning Chart
| Zone | Location in Garden | Moisture Level | Recommended Plants (Botanical Names) |
|---|---|---|---|
| Zone 1 (The Bottom) | Center / Lowest point | Wet to standing water (0-24 hrs) | Asclepias incarnata (Swamp Milkweed), Iris versicolor (Blue Flag Iris), Cephalanthus occidentalis (Buttonbush) |
| Zone 2 (The Slopes) | Inner sides of the basin | Alternating wet and dry | Echinacea purpurea (Purple Coneflower), Monarda didyma (Bee Balm), Panicum virgatum (Switchgrass) |
| Zone 3 (The Berm) | Outer edges and top of berm | Dry, well-drained | Rudbeckia hirta (Black-Eyed Susan), Sedum spectabile (Showy Stonecrop), Schizachyrium scoparium (Little Bluestem) |
Pro Tip: Always choose native species whenever possible. Native plants possess deep, extensive root systems (often reaching 4 to 10 feet deep) that act as natural biological filters and create macropores in the soil, drastically improving water infiltration rates over time. When planting, ensure the crown of the plant is level with the surrounding soil. Planting too deep in the wet Zone 1 can cause crown rot, while planting too high in Zone 3 will expose the roots to rapid drying.
Step 5: Budgeting and Cost Breakdown
Planning your budget early prevents mid-project surprises. While a professional landscaping company will typically charge between $15 and $30 per square foot to design and install a rain garden, a DIY approach can cut costs by more than half.
Estimated DIY Material Costs (for a 150 sq. ft. garden)
- Excavation and Tools: $50 - $100 (Assuming you own a spade and wheelbarrow; renting a mini-excavator adds ~$250/day).
- Soil Amendments (Sand, Compost): $150 - $250 (Purchased in bulk from a local landscape supply yard).
- Plants (Plugs and 1-Gallon Pots): $200 - $400 (Requires roughly 40-60 plants spaced 12-18 inches apart).
- Hardwood Mulch: $40 - $60 (2-3 cubic yards).
- Downspout Extenders and River Rock: $30 - $50 (For directing water into the basin and protecting the inlet from erosion).
- Total Estimated DIY Cost: $470 - $860
Step 6: Mulching and Long-Term Maintenance
The final step in the installation phase is applying a 2-to-3-inch layer of mulch. Never use pine bark or lightweight mulches in a rain garden; they will float away during the first heavy storm. Instead, use triple-shredded hardwood mulch or aged wood chips, which interlock and stay in place while water percolates through them.
The First-Year Maintenance Plan
A rain garden is not a plant it and forget it landscape feature, especially during its establishment phase.
- Watering: During the first growing season, water the plants deeply once a week if rainfall is less than 1 inch. The deep root systems take a full year to establish.
- Weeding: Aggressive weeds will try to colonize the disturbed soil. Hand-pull weeds monthly to prevent them from outcompeting your native plugs.
- Sediment Removal: Inspect the inlet where water enters the garden. If sediment or debris builds up, remove it to ensure water can flow freely into the basin.
- Mulch Replenishment: Top off the mulch annually in early spring to maintain the 2-inch depth, ensuring the soil remains cool and weed seeds are suppressed.
Conclusion: A Sustainable Landscape Investment
Planning a rain garden is a rewarding intersection of environmental stewardship and landscape design. By carefully selecting your site, engineering the soil profile, zoning your plants, and budgeting for quality materials, you create a dynamic outdoor space that solves drainage issues while supporting local pollinators. Whether you are tackling a small 100-square-foot front yard basin or a sprawling backyard bioretention swale, the principles of hydrology and native planting remain your greatest tools for success.

