
Landscaping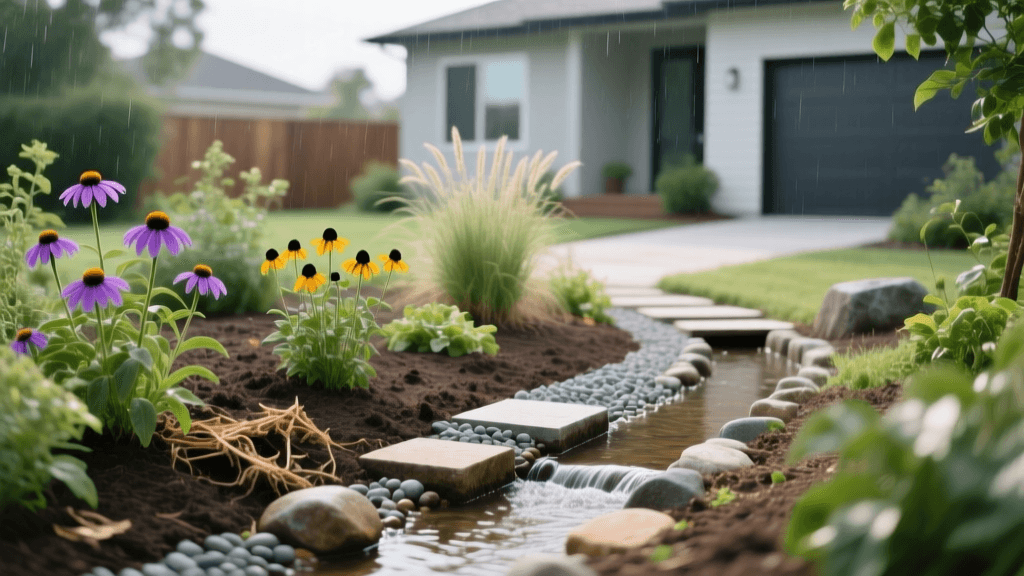
How to Plan a Rain Garden: Design, Plants, and Costs
Transforming Yard Drainage into a Landscape Feature
Stormwater runoff is a significant challenge for modern homeowners, often leading to eroded lawns, flooded basements, and polluted local waterways. According to the Environmental Protection Agency (EPA), stormwater runoff picks up oil, fertilizers, and pesticides, carrying them directly into streams and lakes. Rather than relying on unsightly French drains or corrugated plastic tubing, landscape designers are increasingly turning to rain gardens. A rain garden is a shallow, planted depression that captures and filters stormwater, allowing it to slowly infiltrate the soil. When planned correctly, a rain garden serves as a stunning focal point that boosts curb appeal while solving complex drainage issues. This guide will walk you through the design principles, site planning, plant selection, and budgeting required to install a functional and beautiful rain garden in your own yard.
Strategic Site Selection: Where to Place Your Rain Garden
The success of a rain garden hinges entirely on proper placement. You want to intercept water before it pools against your home or floods your patio, but you must also respect the structural integrity of your property. When surveying your yard during a heavy rainstorm, observe the natural flow of water. Look for areas where downspouts discharge, where driveways slope, or where natural swales form in the lawn.
Follow these critical placement rules during the planning phase:
- The 10-Foot Rule: Always locate your rain garden at least 10 feet away from your home's foundation to prevent basement seepage and structural damage.
- Avoid Septic and Utilities: Never place a rain garden over a septic drain field, and always call 811 to check for underground utilities before digging.
- Tree Canopies: Avoid placing the garden directly under large, established trees. The excavation can damage vital surface roots, and the tree's canopy will block the rainfall from entering the garden bed.
- Slope Considerations: Ideal locations have a gentle slope (between 2% and 5%). If your yard is entirely flat, you will need to design a wider, shallower basin and rely on a French drain or rock swale to route water into the garden.
The Percolation Test
Before finalizing your design, you must test your soil's drainage capacity. Dig a hole 12 inches deep and 6 inches wide in your proposed location. Fill it with water and let it drain completely to saturate the soil. Then, fill it again and measure how many inches the water level drops per hour. An ideal infiltration rate is 1 inch per hour or faster. If your soil is heavy clay and drains slower than 0.5 inches per hour, you will need to engineer a specialized soil mix or install an underdrain pipe to prevent water from stagnating.
Designing the Layout: Dimensions and Aesthetics
For most residential properties, a rain garden between 100 and 300 square feet is sufficient to handle the runoff from a standard roof and driveway. The depth of the basin should be between 6 and 8 inches. This specific depth is crucial for mosquito control; mosquitoes require at least 72 hours of standing water to breed, while a properly designed rain garden will absorb and infiltrate water within 24 to 48 hours.
From a design perspective, avoid rigid geometric shapes like perfect rectangles or squares, which can look out of place in a natural lawn setting. Instead, opt for organic, curvilinear shapes like kidneys, crescents, or teardrops. These shapes blend seamlessly into existing garden beds and mimic natural landscape formations. You can also incorporate a dry creek bed lined with river rock to visually and functionally channel water from your downspout into the rain garden basin.
Engineering the Soil: The Bioretention Mix
Native soil, particularly heavy clay, is rarely suitable for a rain garden on its own. To ensure rapid drainage and provide a healthy environment for deep-rooted native plants, you must amend the soil. According to guidelines published by the Rutgers Cooperative Extension, a highly effective bioretention soil mix should consist of specific ratios to balance drainage and nutrient retention.
Rutgers Cooperative Extension Bioretention Soil Mix:
50% Coarse Sand (washed, to prevent compaction)
25% Topsoil (sandy loam, screened)
25% Leaf Compost (aged and shredded)
Plan to excavate your basin to a depth of 12 to 18 inches and replace the native soil with this engineered mix. This ensures that even during torrential downpours, the water has the porosity required to percolate downward rather than pooling on the surface.
Plant Selection: Zoning for Survival and Curb Appeal
A rain garden is not a uniform environment; it features distinct microclimates based on moisture levels. To ensure plant survival and continuous visual interest, landscape designers divide the garden into three distinct zones. Always choose native plants, as their deep root systems (often reaching 4 to 8 feet deep) act as natural pipes, breaking up compacted soil and accelerating water infiltration.
Zone 1: The Basin (Bottom Center)
This is the lowest point of the garden and will experience the most frequent pooling and the longest periods of saturation. Plants here must tolerate 'wet feet' and occasional submersion.
- Swamp Milkweed (Asclepias incarnata): Essential for Monarch butterflies, featuring beautiful pink blooms.
- Blue Flag Iris (Iris versicolor): Provides striking vertical architecture and vibrant purple flowers in early summer.
- Cardinal Flower (Lobelia cardinalis): Offers brilliant red spikes that attract hummingbirds in late summer.
Zone 2: The Slopes (Middle Ring)
The sides of the rain garden experience alternating cycles of saturation and drying out. Plants here must be highly adaptable to fluctuating moisture levels.
- Black-Eyed Susan (Rudbeckia hirta): A hardy, drought-tolerant native that provides cheerful yellow blooms from mid-summer to fall.
- New England Aster (Symphyotrichum novae-angliae): Delivers crucial late-season nectar with vibrant purple daisy-like flowers.
- Switchgrass (Panicum virgatum): A deep-rooted ornamental grass that adds texture, movement, and winter interest.
Zone 3: The Edges (Outer Ring)
The outer edges and the top of the berm are the driest parts of the garden, relying mostly on natural rainfall rather than concentrated runoff.
- Purple Coneflower (Echinacea purpurea): A classic, low-maintenance perennial that thrives in well-drained soil.
- Little Bluestem (Schizachyrium scoparium): A smaller ornamental grass that turns a stunning bronze-orange in autumn.
- Wild Geranium (Geranium maculatum): An excellent groundcover that provides delicate pink spring blooms and weed suppression.
Project Planning: Costs, Materials, and Timing
Timing is critical for a successful installation. The best time to plant a rain garden is in early spring or early fall when temperatures are mild and natural rainfall can help establish new root systems without the need for constant manual irrigation.
Budgeting for a rain garden varies based on whether you choose to tackle the heavy excavation yourself or hire a professional landscaping contractor. Below is a cost comparison chart for a standard 150-square-foot rain garden.
| Project Component | DIY Estimated Cost | Professional Installation Cost |
|---|---|---|
| Excavation & Soil Removal | $0 (Sweat Equity) | $600 - $1,200 |
| Bioretention Soil Mix (approx. 8 cubic yards) | $250 - $400 | $500 - $800 (including delivery) |
| Native Plants (Plugs & 1-Gallon Pots) | $150 - $300 | $400 - $700 |
| Mulch & River Rock (for inflow/outflow) | $75 - $150 | $200 - $350 |
| Labor & Design Fees | $0 | $1,500 - $3,000 |
| Total Estimated Project Cost | $475 - $850 | $3,200 - $6,050 |
Step-by-Step Installation Timeline
Weekend 1: Earthworks and Soil Prep
Begin by outlining your design with landscaping spray paint. Excavate the basin to a depth of 12 inches, ensuring the bottom is relatively flat while the sides slope gently at a 3:1 ratio. Use the excavated native soil to build a berm on the downhill side of the garden to hold water in the basin. Tamp the berm down firmly. Next, mix and spread your engineered bioretention soil mix to a depth of 8 to 10 inches.
Weekend 2: Planting and Mulching
Arrange your plants in their pots according to your zoning plan before digging any holes. Once satisfied with the visual layout, plant them at the same depth they were in their nursery pots. Water them in deeply. Finally, apply a 2-inch layer of double-shredded hardwood mulch. Avoid pine bark or lightweight wood chips, as these will float away during the first heavy rainstorm. Place a layer of river rock at the point where water enters the garden to dissipate the energy of the flow and prevent soil erosion.
Long-Term Maintenance Planning
While rain gardens are designed to be low-maintenance landscape features, they do require care during their first year of establishment. Plan to water the garden deeply once a week during dry spells for the first 12 months. Weeding is essential early on, as native plants take time to develop the dense canopy required to naturally suppress weeds. Avoid using chemical fertilizers or pesticides in or around the rain garden; the goal is to filter pollutants, not introduce them. Once established, your rain garden will require minimal upkeep, serving as a thriving, sustainable ecosystem that protects your home and enhances your outdoor living space for decades to come.

