
Landscaping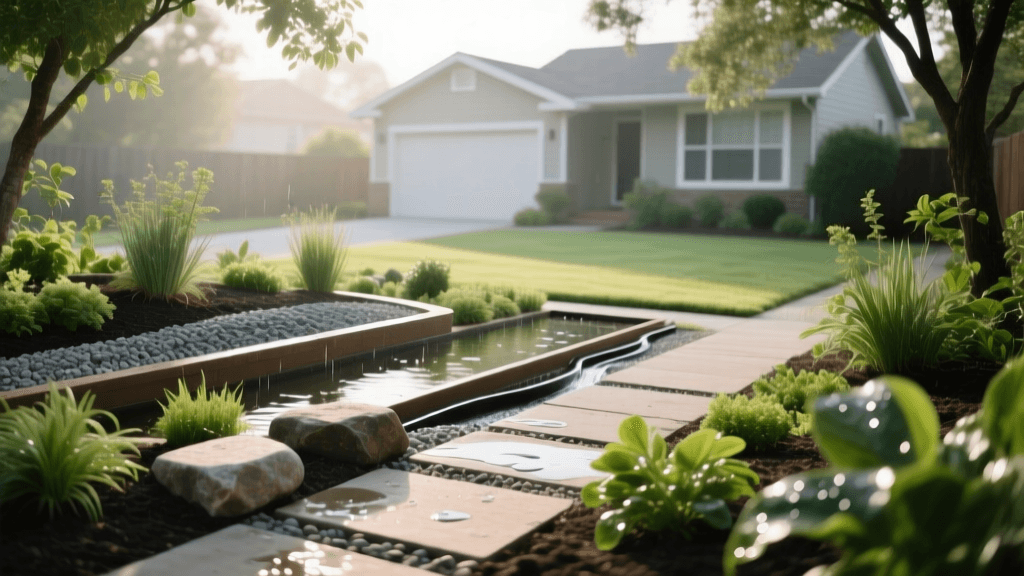
Planning a Residential Rain Garden for Drainage and Curb Appeal
Water pooling in your yard after a heavy downpour is more than just a nuisance; it is a direct threat to your home's foundation, your lawn's root system, and local municipal waterways. When impervious surfaces like roofs and driveways shed water, that runoff collects pollutants and overwhelms storm drains. Enter the rain garden: a beautifully landscaped, shallow depression designed to capture, filter, and absorb stormwater. Planning a residential rain garden is one of the most impactful landscaping projects you can undertake. It seamlessly merges vital drainage solutions with stunning curb appeal, transforming a soggy, unusable patch of grass into a thriving, eco-friendly oasis. In this comprehensive design and planning guide, we will walk you through the exact steps, measurements, and material costs required to plan a rain garden that functions flawlessly and looks spectacular year-round.
Step 1: Site Selection and Safety Precautions
The success of a rain garden relies entirely on proper placement. You want to intercept water naturally, but you must also protect your property's structural integrity. When scouting your yard for the ideal location, adhere to these critical planning rules:
- Distance from Foundation: Always position the rain garden at least 10 feet away from your home's foundation to prevent water from seeping into your basement or crawlspace.
- Utility Check: Before breaking ground, call 811 to have local utility companies mark underground gas, water, and electrical lines. Never dig a rain garden over a septic drain field or shallow utility lines.
- Slope and Elevation: Look for a natural depression or a low-lying area that already collects water. However, avoid placing the garden at the very bottom of a steep slope, as the velocity of the rushing water can cause severe erosion.
- Sunlight Exposure: Most water-loving native plants require full sun to partial shade (at least 4 to 6 hours of direct sunlight daily) to thrive and transpire water efficiently.
Step 2: The Percolation Test
Before finalizing your design, you must determine your soil's infiltration rate. The goal of a rain garden is to hold water temporarily, allowing it to percolate into the ground within 24 to 48 hours. Standing water beyond this window becomes a breeding ground for mosquitoes.
To perform a standard percolation test, dig a hole approximately 8 inches deep and 6 inches wide in your proposed location. Fill the hole with water and let it drain completely to saturate the surrounding soil. Refill the hole and measure the water level drop every hour. According to guidelines published by the University of Wisconsin-Madison Extension, your soil must drain at a minimum rate of 1 inch per hour to support a standard rain garden without requiring an underdrain system. If your soil is heavy clay and drains slower than this, you will need to plan for a larger surface area, a shallower depth, or the installation of a perforated PVC underdrain connected to a daylight exit point.
Step 3: Sizing Your Rain Garden
Sizing is a crucial planning phase that ensures your garden can handle the volume of runoff from your roof and driveway. The Environmental Protection Agency (EPA) recommends sizing rain gardens to capture the 'first flush' of rainfall, typically the first 1 inch of rain from a storm event.
To calculate the required square footage, first determine the drainage area (the square footage of the roof or driveway shedding water into the garden). Multiply this area by the runoff coefficient (0.9 for asphalt roofs, 0.8 for driveways). Then, divide that number by the depth of your planned garden (typically 6 inches, or 0.5 feet). For example, if a 500-square-foot roof section drains into the garden, and you plan a 6-inch depth, you will need a rain garden of approximately 75 to 100 square feet, depending on your soil's porosity.
Step 4: Routing Water to the Garden
A rain garden is only as effective as its water delivery system. During the planning phase, map out how water will travel from the downspout to the depression. You have three primary options:
- Downspout Extensions: Use flexible or rigid 4-inch corrugated PVC piping to route water directly from the gutter downspout into the garden. Bury the PVC pipe 4 to 6 inches underground and cover it with sod or mulch for a clean look.
- Grassy Swales: If the garden is nearby, shape a shallow, gently sloping ditch (a swale) lined with turfgrass to guide the water via gravity.
- French Drains: For longer distances or heavily saturated yards, install a perforated pipe wrapped in landscape fabric and buried in a gravel trench to channel water subsurface.
Step 5: Designing the Soil Profile
Native topsoil is rarely sufficient for a rain garden, especially if it contains high clay content. You must plan to excavate the existing soil to a depth of 12 to 18 inches and replace it with a specialized bioretention soil mix. The industry-standard rain garden soil recipe consists of:
- 60% Coarse Washed Sand: Provides essential drainage and prevents compaction.
- 20% Topsoil: Offers structure and mineral content.
- 20% Organic Compost: Retains moisture, provides nutrients, and fosters microbial activity to break down pollutants.
Order this mix from a local landscape supply yard in bulk (measured in cubic yards) to save money compared to buying bagged soils.
Step 6: Planting Zones and Species Selection
A well-designed rain garden features three distinct microclimates based on moisture levels. Planning your plant layout around these zones ensures high survival rates and continuous visual interest.
- Zone 1 (The Bottom): The lowest point of the garden. This area experiences the most prolonged saturation. Plants here must tolerate 'wet feet' and standing water for up to 48 hours.
- Zone 2 (The Slopes): The transitional areas. These plants must be highly adaptable, surviving both temporary flooding and periods of summer drought.
- Zone 3 (The Edges/Berm): The highest, driest perimeter of the garden. Plants here should be drought-tolerant and possess deep root systems to stabilize the soil berm.
Rain Garden Plant Selection Chart
| Zone | Common Name | Botanical Name | Light Requirement | Mature Height |
|---|---|---|---|---|
| Zone 1 (Bottom) | Blue Flag Iris | Iris versicolor | Full Sun / Part Shade | 2 - 3 feet |
| Zone 1 (Bottom) | Swamp Milkweed | Asclepias incarnata | Full Sun | 3 - 4 feet |
| Zone 2 (Slopes) | New England Aster | Symphyotrichum novae-angliae | Full Sun | 3 - 5 feet |
| Zone 2 (Slopes) | Joe-Pye Weed | Eutrochium purpureum | Full Sun / Part Shade | 4 - 6 feet |
| Zone 3 (Edges) | Purple Coneflower | Echinacea purpurea | Full Sun | 2 - 4 feet |
| Zone 3 (Edges) | Little Bluestem | Schizachyrium scoparium | Full Sun | 2 - 3 feet |
Budgeting and Cost Breakdown
Planning your budget early prevents project stall-outs. A DIY residential rain garden typically costs between $5 and $15 per square foot, depending on soil conditions, plant maturity, and hardscaping accents. Here is a structured cost estimate for a standard 100-square-foot rain garden:
- Excavation and Labor (DIY): $0 (Approx. 10-15 hours of manual labor)
- Bulk Bioretention Soil Mix (3-4 cubic yards): $120 - $200 (plus delivery)
- Native Plants (Plugs and 1-Gallon Pots): $150 - $300 (Plan for 30-50 plants)
- Double-Shredded Hardwood Mulch (2-3 cubic yards): $60 - $90
- 4-inch PVC Pipe and Fittings (for downspout routing): $40 - $75
- Landscape Fabric, River Rock (for splash pads), and Edging: $50 - $100
- Total Estimated DIY Cost: $420 - $765
Note: Hiring a professional landscaping contractor will increase the cost to $20 - $40 per square foot due to heavy machinery excavation, design fees, and guaranteed plant warranties.
Long-Term Maintenance Planning
A rain garden is a living infrastructure project that requires specific maintenance to remain functional and beautiful. During the first two years, weekly weeding and supplemental watering during dry spells are mandatory while the deep root systems establish themselves. Once established, the garden becomes largely self-sustaining.
Plan to refresh the mulch annually. Always use double-shredded hardwood mulch or pine straw. Avoid cedar bark, cypress mulch, or large wood chips, as these are highly buoyant and will float out of the garden during heavy storms, clogging your overflow exits. Additionally, inspect the inlet and overflow areas seasonally to remove sediment buildup, leaves, and debris that could restrict water flow.
Conclusion
Designing and planning a rain garden is a rewarding investment in both your property's value and the local ecosystem. By carefully selecting your site, engineering the proper soil profile, and choosing resilient native plants, you can eliminate chronic yard drainage issues while cultivating a vibrant, pollinator-friendly landscape feature that stands the test of time.

