Tree Care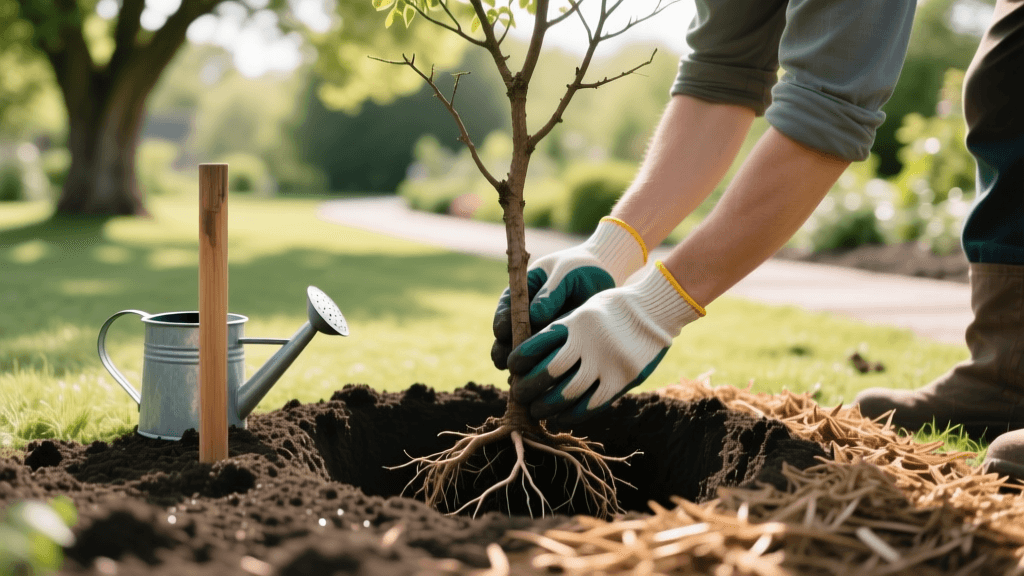
How to Plant a Bare-Root Tree: A Step-by-Step Guide
Planting a tree is one of the most rewarding investments you can make in your home landscape, providing shade, beauty, and ecological benefits for decades. While container-grown and balled-and-burlapped trees are common, bare-root trees offer a highly practical, cost-effective, and often superior alternative for home gardeners. Bare-root trees are dug from nursery fields while dormant and sold without soil around their roots. Because they are not constrained by a pot, their root systems are often more natural and expansive, allowing for faster establishment once planted correctly.
However, because their roots are exposed, bare-root trees require specific handling, precise timing, and careful planting techniques to ensure survival. In this comprehensive how-to guide, we will walk you through the exact steps, measurements, and materials needed to successfully plant a bare-root tree in your yard.
Why Choose Bare-Root Trees?
Before diving into the planting process, it is helpful to understand why many arborists and landscapes prefer bare-root stock. First, they are significantly lighter and easier to transport than container trees, reducing the physical strain on the gardener. Second, they are typically 30% to 50% less expensive because the nursery does not incur the costs of soil, heavy plastic pots, and year-round watering. Finally, bare-root trees do not suffer from the circling or girdling roots that frequently plague container-grown trees, leading to a healthier, more stable root architecture in the long term.
Tools and Materials Needed
Gathering the right tools before you begin will streamline the planting process and prevent the delicate roots from drying out. Expect to spend roughly $75 to $120 on tools and materials if you do not already own them.
- Round-point shovel or spade: For digging and cutting through sod ($30 - $45).
- Bypass hand pruners: For making clean cuts on damaged roots ($20 - $30).
- Large bucket or tarp: For soaking the root system ($10 - $15).
- Organic mulch: Shredded hardwood or pine bark ($5 - $8 per bag).
- Tree stakes and broad ties: Only if necessary for stabilization ($15 - $25).
- Garden hose with a slow-flow nozzle: For deep, initial watering.
Step 1: Timing and Root Preparation
Timing is the most critical factor when planting bare-root stock. According to the University of Minnesota Extension, bare-root trees should be planted in early spring, just as the ground thaws but before the tree breaks dormancy and begins to push out new leaves. In warmer climates, late fall planting after the tree has dropped its leaves is also highly effective.
Once your tree arrives, unpack it immediately. If the roots look dry, mist them with water. You must rehydrate the root system before planting. Submerge the roots entirely in a large bucket of water or a tarp-lined trench for 4 to 12 hours. Do not exceed 24 hours of soaking, as the roots will begin to drown and suffocate. While the tree is soaking, inspect the roots and use your bypass pruners to snip away any broken, diseased, or severely tangled root ends. Make clean cuts just above the damage to encourage rapid callusing and new root growth.
Step 2: Digging the Perfect Hole
The dimensions of your planting hole dictate the future health and stability of your tree. A common mistake is digging a hole that is too deep and too narrow. Instead, you want to dig a wide, shallow hole that encourages lateral root expansion.
Width and Depth Measurements
Measure the total spread of the root system. Your hole should be two to three times wider than the root spread. This loosens the surrounding soil, making it easier for young feeder roots to penetrate and establish. The depth of the hole should be slightly less than the length of the root system. The tree must sit on undisturbed, solid soil at the bottom of the hole to prevent it from sinking over time.
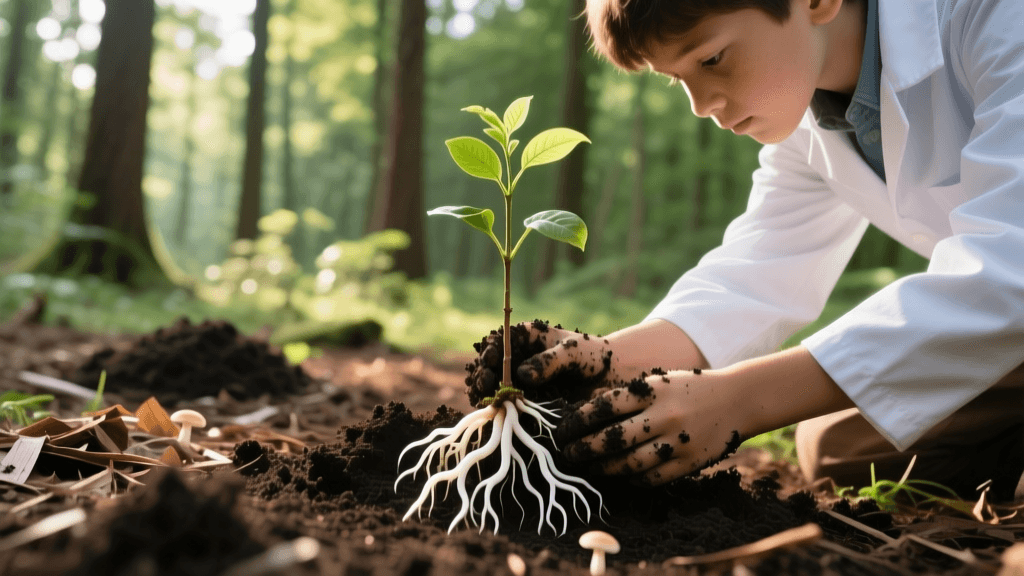
Identifying the Root Flare
Before placing the tree in the hole, locate the root flare (also known as the trunk flare). This is the area at the base of the trunk where the trunk widens and transitions into the structural roots. The root flare must remain visible and slightly above the final soil grade. Planting a tree too deeply, which buries the root flare, is the number one cause of transplant failure and long-term trunk rot.
Step 3: Positioning and Backfilling
Once the hole is dug, create a small cone or mound of native soil in the center of the hole. Lift the tree by its roots (never by the trunk) and drape the root system evenly over the soil cone. Ensure the roots are pointing downward and outward, not bunched up or circling.
Begin backfilling with the native soil you removed from the hole. The Arbor Day Foundation strongly advises against amending the backfill soil with heavy compost, peat moss, or fertilizers. Amending the soil in the planting hole creates a 'bathtub effect,' where water pools in the loose, rich soil of the hole rather than draining into the surrounding native clay or sand. Furthermore, roots will stay confined to the rich amended soil rather than venturing out into the native landscape.
When the hole is half full, water it thoroughly to settle the soil and eliminate large air pockets. Allow the water to drain, then finish backfilling to the top of the hole. Gently tamp the soil down with your hands or the flat back of your shovel, but do not pack it so tightly that it restricts oxygen flow to the roots.
Step 4: To Stake or Not to Stake?
Contrary to popular belief, not all newly planted trees require staking. In fact, trees that are allowed to sway gently in the wind develop stronger, thicker trunks and more robust root systems. You should only stake a bare-root tree if it is top-heavy, planted in an exceptionally windy area, or situated on a steep slope.
If staking is necessary, use broad, flexible canvas or rubber ties that will not cut into the bark. Remove the stakes after one growing season. The table below outlines the most common staking methods based on tree size and site conditions, as outlined by the Clemson University Home & Garden Information Center.
| Staking Method | Best Used For | Pros | Cons |
|---|---|---|---|
| Single Stake | Small trees, mild wind zones | Inexpensive, easy to install, minimal visual impact. | Can cause the tree to lean away from the stake if not monitored; offers limited lateral support. |
| Double Stake | Medium trees, moderate wind areas | Provides excellent trunk stabilization; keeps the tree perfectly upright. | More expensive; requires precise placement to avoid damaging the root ball during installation. |
| Guying (Anchors) | Large trees, high wind zones, slopes | Maximum stability for heavy canopies; prevents uprooting. | Creates a tripping hazard in the yard; requires significant space; must be removed promptly. |
Step 5: Mulching and Initial Watering
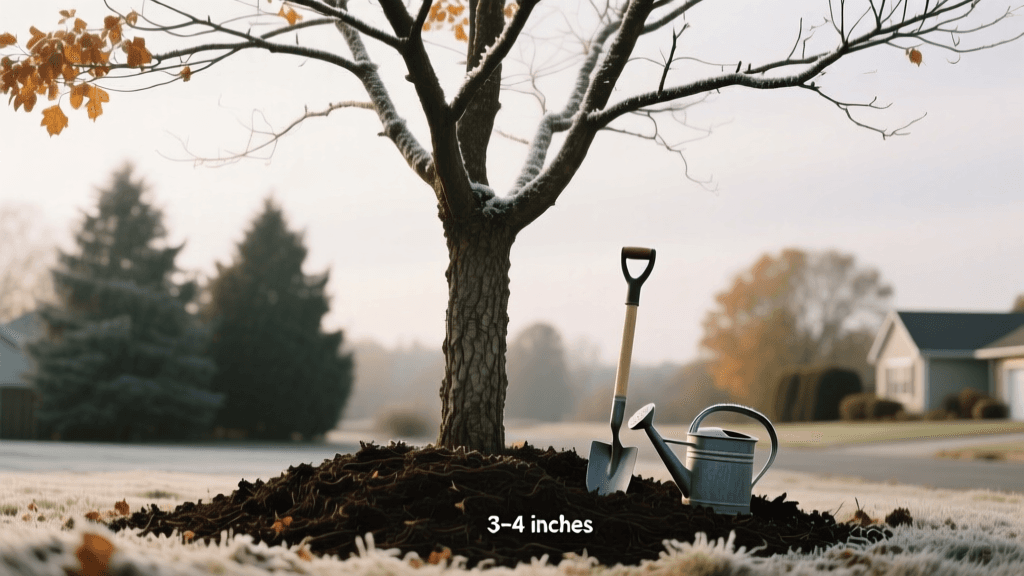
Proper mulching is essential for moisture retention, temperature regulation, and weed suppression. Apply a 2 to 3-inch layer of organic mulch (such as shredded hardwood bark or wood chips) in a wide ring around the tree. The mulch ring should extend at least 2 to 3 feet out from the trunk.
Critical Warning: Never pile mulch against the trunk of the tree. This practice, known as 'volcano mulching,' traps moisture against the bark, leading to fungal diseases, rot, and inviting rodent damage. Always maintain a 2-inch mulch-free gap directly around the base of the trunk, keeping the root flare exposed to the air.
Immediately after mulching, give the tree a deep, slow watering. Use a garden hose set to a slow trickle and let it run at the base of the tree for 30 to 45 minutes. This ensures the water penetrates deeply into the backfill and the surrounding native soil, encouraging the roots to grow downward.
First-Year Aftercare and Maintenance
The first year is the most vulnerable period for a newly planted bare-root tree. Because the tree has lost a significant portion of its root system during the nursery harvesting process, it cannot efficiently uptake water. You must act as its irrigation system.
- Watering Schedule: Provide roughly 1 to 1.5 inches of water per week during the growing season. Check the soil moisture by digging a small test hole 4 inches deep near the root zone. If the soil feels dry and crumbly, it is time to water. If it feels muddy, hold off.
- Fertilization: Do not fertilize a bare-root tree during its first year. Fertilizers, especially those high in nitrogen, will push the tree to produce leafy canopy growth before the root system is established enough to support it, leading to severe stress.
- Pruning: Limit pruning at planting time to removing only dead, damaged, or crossing branches. Avoid heavy structural pruning until the tree has established for at least one full year.
By following these precise measurements, respecting the biology of the root flare, and providing consistent first-year moisture, your bare-root tree will quickly overcome transplant shock. Within three to five years, it will likely outgrow and outperform a container-grown tree planted on the exact same day, rewarding your practical labor with decades of robust health and vibrant canopy growth.