
Landscaping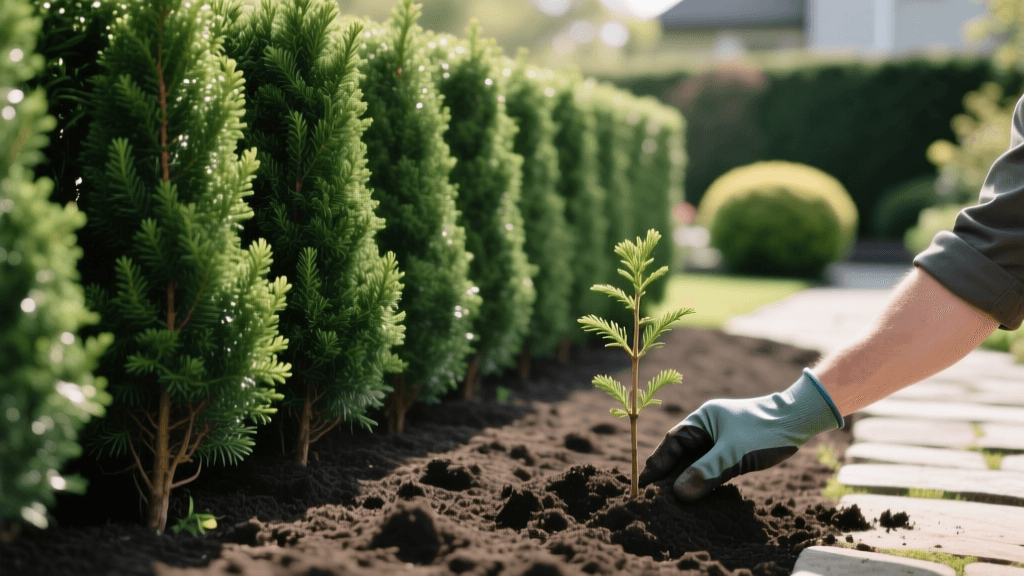
Beginner Guide: Planting an Arborvitae Privacy Hedge
The Ultimate Beginner's Guide to Planting an Arborvitae Privacy Hedge
Creating a natural privacy screen is one of the most rewarding landscaping projects a homeowner can undertake. While wooden or vinyl fences offer immediate seclusion, they can be prohibitively expensive, often costing between $30 and $60 per linear foot. A living fence, on the other hand, adds immense curb appeal, improves local air quality, and provides a lush, green backdrop for your outdoor living spaces. For beginners looking for fast-growing, low-maintenance results, the Thuja 'Green Giant' Arborvitae is the undisputed gold standard in landscape design.
This comprehensive, beginner-friendly growing guide will walk you through every step of planning, planting, and maintaining an Arborvitae privacy hedge. We will cover exact measurements, product recommendations, and timing to ensure your new landscape investment thrives for decades.
Why Choose the Green Giant Arborvitae?
Before breaking ground, it is important to understand why landscape architects and home gardeners alike swear by the Green Giant. A hybrid cross between the Western Redcedar and Japanese Arborvitae, this evergreen boasts several incredible traits:
- Explosive Growth Rate: Once established, Green Giants can grow 3 to 5 feet per year under optimal conditions.
- Disease and Pest Resistance: Unlike the Leyland Cypress, which is prone to devastating fungal cankers, the Green Giant is highly resistant to most common landscape diseases.
- Deer Resistance: While no plant is 100% deer-proof, the Thuja Green Giant is significantly less palatable to deer than other arborvitae varieties.
- Adaptability: It thrives in USDA Hardiness Zones 5 through 8 and adapts well to a wide variety of soil types, from heavy clay to sandy loam.
Step 1: Planning, Spacing, and Budgeting
The most common mistake beginners make is planting trees too close together. While you may want instant privacy, overcrowding leads to competition for water, poor air circulation, and increased susceptibility to fungal diseases. Green Giants can reach a mature width of 12 to 20 feet if left unpruned. To create a dense hedge, you must balance spacing with your budget and timeline.
| Desired Privacy Level | Spacing (Center-to-Center) | Time to Full Privacy | Estimated Cost per Plant (6ft B&B) |
|---|---|---|---|
| Dense, Impenetrable Screen | 5 to 6 feet | 2 to 3 years | $110 - $160 |
| Standard Privacy Hedge | 8 to 10 feet | 3 to 5 years | $110 - $160 |
| Staggered Double Row | 8 feet apart, rows 4 feet apart | 1 to 2 years | $110 - $160 (x2) |
Note: 'B&B' stands for Balled and Burlapped. While you can buy smaller container-grown trees for $40 to $60, starting with 6-to-8-foot B&B trees gives you a massive head start and reduces the time your yard is exposed.
Step 2: Soil Preparation and Site Assessment
Arborvitae prefer a slightly acidic to neutral soil pH, ideally between 6.0 and 7.5. Before purchasing your trees, buy a basic soil test kit from your local garden center or contact your local university extension office for a professional analysis. If your soil is highly alkaline (above 8.0), you may need to amend it with elemental sulfur.
Drainage is the single most critical factor for tree survival. Green Giants do not tolerate 'wet feet' or standing water. To test your drainage, dig a test hole 12 inches deep and fill it with water. If it takes longer than 4 hours to drain, you have heavy clay soil. In this case, you will need to plant your trees slightly above grade (creating a raised berm) or heavily amend the soil with organic compost and pine bark fines to improve percolation.
Step 3: Digging and Planting
Safety First: Always call 811 (the national call-before-you-dig number) at least three business days before you start digging to have underground utility lines marked. This free service prevents costly and dangerous accidents.
The Planting Process
- Dig the Hole: The hole should be 2 to 3 times as wide as the root ball, but no deeper than the root ball itself. The top of the root flare (where the trunk widens at the base) must sit level with or slightly above the surrounding soil grade.
- Prepare the Tree: Carefully cut away the synthetic burlap and wire cage. Leaving wire cages on can eventually girdle and kill the tree. If the roots are circling tightly, use a sterilized pruning saw to make three vertical, one-inch-deep slices down the sides of the root ball to encourage outward growth.
- Amend the Backfill: Mix your native soil with 20% organic compost. Add a starter fertilizer specifically designed for root development, such as Espoma Bio-tone Starter Plus (4-3-3), which contains beneficial mycorrhizae to help the roots establish quickly.
- Backfill and Water: Fill the hole halfway with your amended soil, then run a hose to fill the hole with water. Let it drain to eliminate air pockets. Finish filling the hole and gently tamp the soil down with your foot.
Step 4: Mulching and Initial Watering
Mulch is a newly planted tree's best friend. It regulates soil temperature, retains moisture, and suppresses competing weeds. Apply a 3-inch layer of premium hardwood or pine bark mulch in a 3-foot radius around the base of the tree.
Crucial Warning: Never pile mulch against the trunk of the tree. This practice, known as 'volcano mulching,' traps moisture against the bark, leading to rot, disease, and rodent damage. Leave a 3-inch mulch-free gap around the trunk.
Watering Schedule for the First Year
Hand-watering with a hose is often inconsistent and time-consuming. For a hassle-free approach, invest in Treegater watering bags or a drip irrigation line like the Mirro-Gro Soaker Hose. These deliver water slowly and deeply to the root zone.
- Weeks 1-2: Water daily. Ensure the root ball receives about 5 to 10 gallons of water per tree, per day.
- Weeks 3-12: Water every 2 to 3 days. Deep, infrequent watering encourages roots to grow downward rather than staying near the surface.
- Months 4-12: Water once a week with a deep, slow soak, unless you receive at least 1 inch of rainfall that week.
Expert Tips and Common Beginner Mistakes
According to the Penn State Extension, planting depth and poor soil drainage are the leading factors in tree mortality during the first three years of establishment. Their research emphasizes that planting a tree even two inches too deep can suffocate the root system and invite fatal fungal pathogens. Always err on the side of planting slightly high, especially in heavy clay soils.
Avoid These Beginner Pitfalls:
- Over-fertilizing: Do not use high-nitrogen synthetic fertilizers (like Miracle-Gro) on newly planted trees. This forces rapid, weak top growth before the root system is established enough to support it. Stick to slow-release, organic root-stimulators for the first year.
- Shearing the Leader: Never cut the central, top-most leader branch of an Arborvitae. Doing so ruins the natural pyramidal shape and causes the tree to fork, making it vulnerable to splitting under heavy snow loads.
- Ignoring Winter Desiccation: In northern climates, winter winds can strip moisture from evergreen foliage faster than the frozen roots can replace it. For the first winter, consider wrapping your young hedge in burlap or applying an anti-desiccant spray like Wilt Pruf in late November.
First-Year Pruning and Training
While Green Giants require minimal pruning once mature, the first two years are critical for training a dense hedge. In late summer or early fall, lightly shear the lateral (side) branches by about 4 to 6 inches. This tip-pruning forces the tree to push out lateral buds, resulting in a thicker, fuller interior. Avoid pruning in late spring or early summer when the tree is pushing its primary flush of new growth.
Conclusion
Planting an Arborvitae privacy hedge is a straightforward weekend project that yields decades of beauty and seclusion. By respecting the spacing requirements, ensuring proper drainage, and adhering to a strict first-year watering schedule, your Green Giants will transform your landscape. With an investment of roughly $120 per tree and a little bit of elbow grease, you can cultivate a living fence that outshines any timber or vinyl alternative, bringing a touch of professional landscape design right to your backyard.

