Tree Care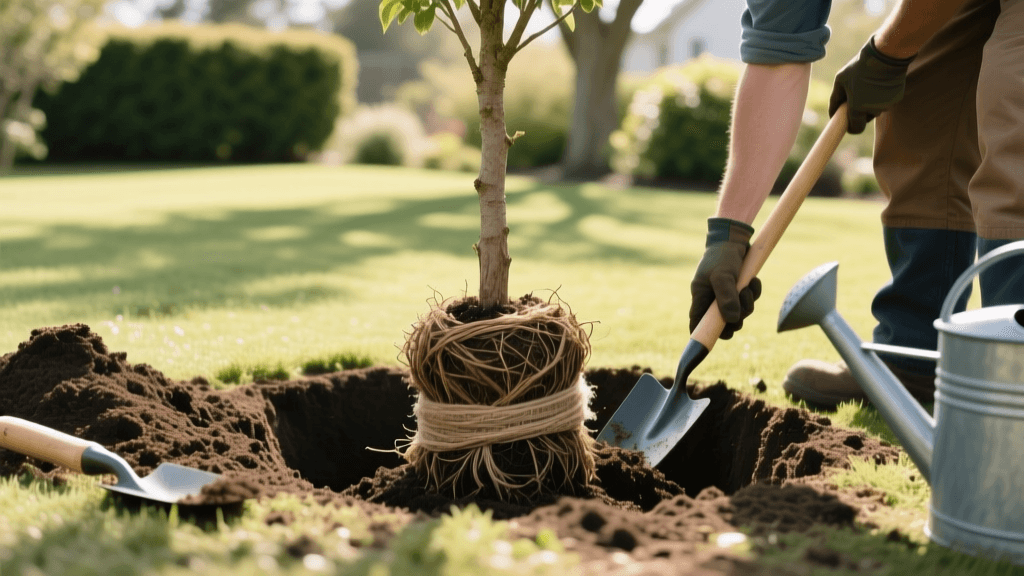
Step-by-Step Guide to Planting Balled and Burlapped Trees
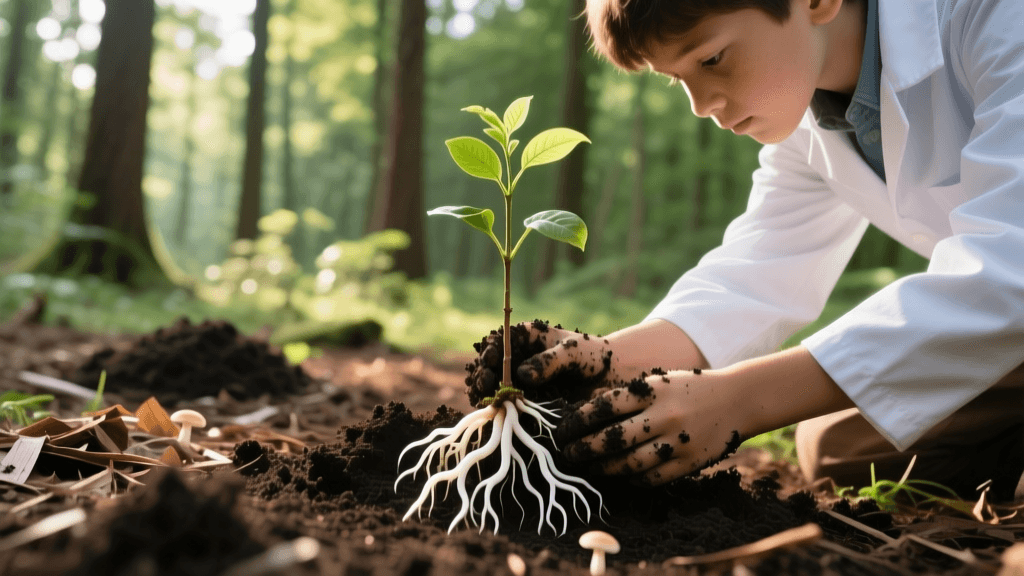
The Ultimate Guide to Planting Balled and Burlapped Trees
Planting a tree is one of the most impactful investments you can make in your landscape. While container-grown trees are popular, balled-and-burlapped (B&B) trees offer distinct advantages. They are typically grown in native soil, which reduces transplant shock, and they provide an instant, mature aesthetic to your yard. However, because B&B trees are heavy and their root systems are tightly bound, improper planting can lead to girdling roots, root rot, and eventual tree death. According to the Arbor Day Foundation, proper planting depth and hole preparation are the most critical factors in ensuring long-term tree survival.
This practical, step-by-step guide will walk you through the exact measurements, tools, and techniques required to plant a B&B tree correctly, ensuring it thrives for decades to come.
Tools and Materials Required
- Round-point digging spade and flat-head shovel
- Heavy-duty tarp or wheelbarrow (for soil removal)
- Wire cutters (bolt cutters) and a sharp utility knife
- Measuring tape
- Garden hose with a slow-flow nozzle or soaker hose
- Organic hardwood mulch
- Wooden stakes and wide canvas tree ties (only if necessary)
Step 1: Timing and Location Selection
The ideal time to plant a B&B tree is during its dormant season. In most temperate climates, this means early spring (after the ground thaws but before bud break) or late fall (after leaf drop but before the ground freezes). Planting during dormancy allows the tree to focus its energy on establishing a robust root system rather than supporting foliage.
When selecting a location, look up and look down. Ensure the planting site is at least 15 to 20 feet away from overhead power lines, building foundations, and underground utilities. Always call your local utility marking service (like 811 in the United States) a few days before digging to have underground lines marked.
Step 2: Find the Trunk Flare
The most common mistake homeowners make is planting a tree too deep. The Clemson Cooperative Extension emphasizes that the trunk flare (the area where the trunk widens at the base and transitions into roots) must be fully visible and slightly above the surrounding soil grade.
B&B trees are often harvested with soil piled over the flare to keep the ball intact. Before digging your hole, gently brush away the top 2 to 3 inches of soil from the top of the root ball until you clearly see the trunk flare. This step dictates the exact depth of your planting hole.
Step 3: Digging the Perfect Hole
A common myth is that you should dig a deep, narrow hole. In reality, tree roots grow laterally, not vertically. Your hole should be shaped like a wide, shallow bowl.
Width:
Dig the hole 2 to 3 times wider than the diameter of the root ball. If your root ball is 24 inches wide, your hole should be 48 to 72 inches across. This loosens the surrounding soil, making it easier for new roots to expand.
Depth:
The depth of the hole should be exactly the height of the root ball, or even 1 to 2 inches shallower. The root ball should rest on solid, undisturbed soil so it does not sink over time. Never loosen the soil at the bottom of the hole.
Step 4: Moving and Placing the Tree
B&B trees are incredibly heavy; a 2.5-inch caliper tree can weigh over 300 pounds. Never lift or carry the tree by its trunk, as this can sever the roots from the trunk inside the burlap. Always lift by the root ball itself, using a heavy-duty tarp, a wheelbarrow, or specialized nursery lifting straps.
Gently roll or lower the tree into the center of the hole. Step back and look at it from multiple angles to ensure it is perfectly straight. Once placed, check the depth again. The trunk flare should sit 1 to 2 inches above the surrounding ground level to account for natural settling.
Step 5: Removing the Wire Basket and Burlap
There is an ongoing debate in the arboriculture community about whether to leave the wire basket and burlap in the ground. The University of Minnesota Extension recommends removing as much of the non-biodegradable material as possible to prevent future girdling and moisture wicking.
- Cut the Wire Basket: Use bolt cutters to snip the top two or three horizontal rings of the wire basket. Remove these rings entirely.
- Remove Synthetic Burlap: If the burlap is synthetic (it will feel plasticky and won't burn easily), it must be completely removed. If it is natural, untreated burlap, you can leave it in the bottom of the hole, but pull it away from the top and sides of the root ball.
- Cut the Twine: Absolutely all twine or rope tied around the trunk must be cut and removed. If left on, it will girdle and kill the tree as it grows.
Step 6: Backfilling with Native Soil
Do not amend the backfill soil with compost, peat moss, or potting mix. Amending the soil in the planting hole creates a "bathtub effect," where water pools in the loose amended soil and drowns the roots, or conversely, water refuses to move from the amended soil into the denser native clay.
Use the exact native soil you dug out of the hole to backfill. Shovel the soil in layers, gently tamping it down with your hands or the handle of your shovel to eliminate large air pockets. Do not stomp on the soil with your boots, as severe compaction restricts oxygen flow to the roots.
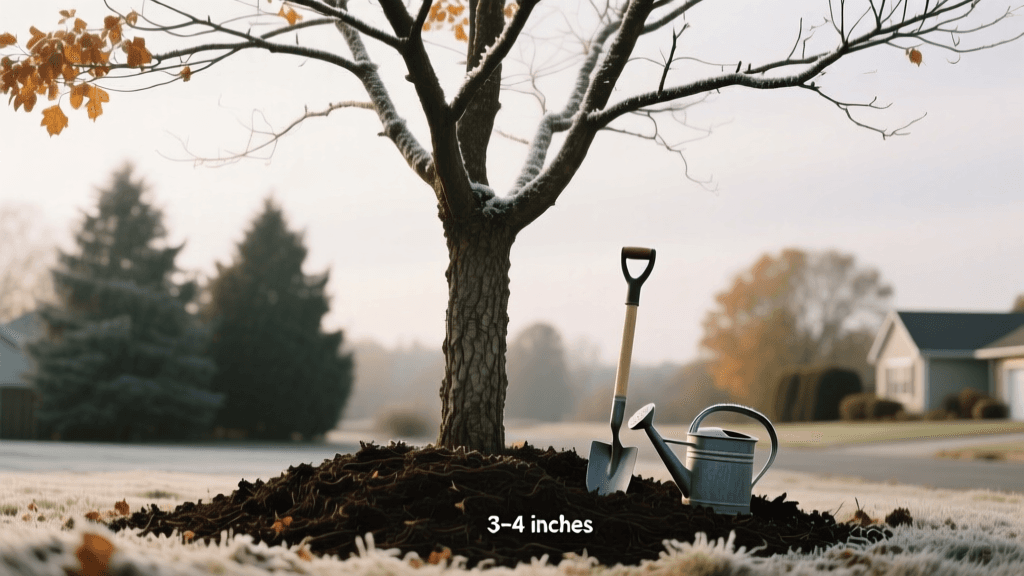
Step 7: Mulching and Watering
Apply a 2 to 3-inch layer of organic hardwood mulch over the entire planting area, extending out to the drip line if possible. Crucial Rule: Keep the mulch at least 3 to 4 inches away from the trunk itself. "Volcano mulching" (piling mulch against the bark) invites fungal diseases, rodent damage, and secondary root growth that will girdle the tree.
Immediately after planting, water the tree deeply and slowly. A good rule of thumb is to provide 10 gallons of water per inch of trunk caliper. For a 2-inch caliper tree, apply 20 gallons of water slowly over an hour to allow it to penetrate the root ball and surrounding soil.
B&B Tree Planting Specifications Chart
Use the table below to determine the correct hole dimensions based on your tree's root ball size.
| Root Ball Diameter | Root Ball Height | Required Hole Width | Required Hole Depth | Estimated Backfill Volume |
|---|---|---|---|---|
| 18 inches | 14 inches | 36 to 54 inches | 12 to 14 inches | Approx. 4 cubic feet |
| 24 inches | 18 inches | 48 to 72 inches | 16 to 18 inches | Approx. 9 cubic feet |
| 30 inches | 22 inches | 60 to 90 inches | 20 to 22 inches | Approx. 16 cubic feet |
| 36 inches | 26 inches | 72 to 108 inches | 24 to 26 inches | Approx. 25 cubic feet |
Post-Planting Care and Staking Rules
Staking a B&B tree is rarely necessary and can actually weaken the trunk by preventing it from developing natural taper and reaction wood. Only stake the tree if it is in a highly exposed, windy area or if the root ball shifts significantly. If you must stake, use two wide, flexible canvas straps placed low on the trunk, and remove them after exactly one year.
First-Year Watering Schedule
- Weeks 1-2: Water daily or every other day (10 gallons per inch of caliper).
- Weeks 3-12: Water every 2 to 3 days, depending on rainfall.
- Months 4-12: Water once a week deeply. Reduce frequency during heavy rain weeks.
- Winter: If the ground is not frozen and there has been no snow/rain for 3 weeks, water deeply on a warm afternoon.
By following these precise measurements and techniques, your balled-and-burlapped tree will establish a strong, deep root system capable of withstanding drought, storms, and the test of time.