Tree Care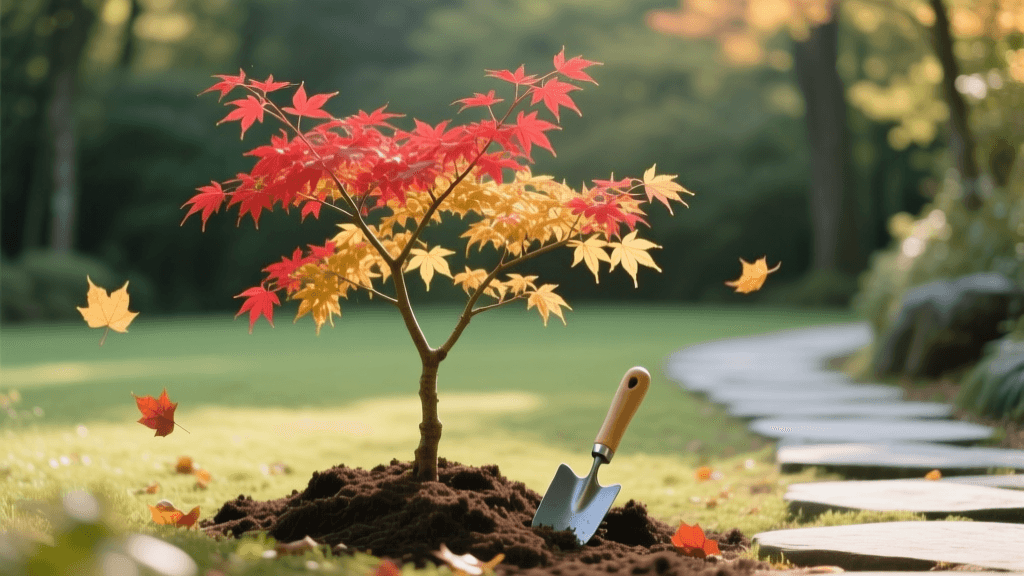
The Beginner's Guide to Planting Japanese Maple Trees
Why Choose a Japanese Maple for Your Landscape?
Japanese maples (Acer palmatum) are widely considered the crown jewels of the ornamental garden. For beginners looking to elevate their landscape, these trees offer an unmatched combination of delicate foliage, striking seasonal color changes, and manageable sizes. Whether you are looking to create a tranquil Zen garden, frame your front entryway, or add a pop of burgundy to your backyard, a Japanese maple is an excellent investment. While they have a reputation for being somewhat finicky, the truth is that with the right planting technique and a basic understanding of their environmental preferences, Japanese maples are incredibly rewarding and resilient. In this comprehensive, beginner-friendly guide, we will walk you through everything you need to know to successfully plant, grow, and maintain a thriving Japanese maple tree in your yard.
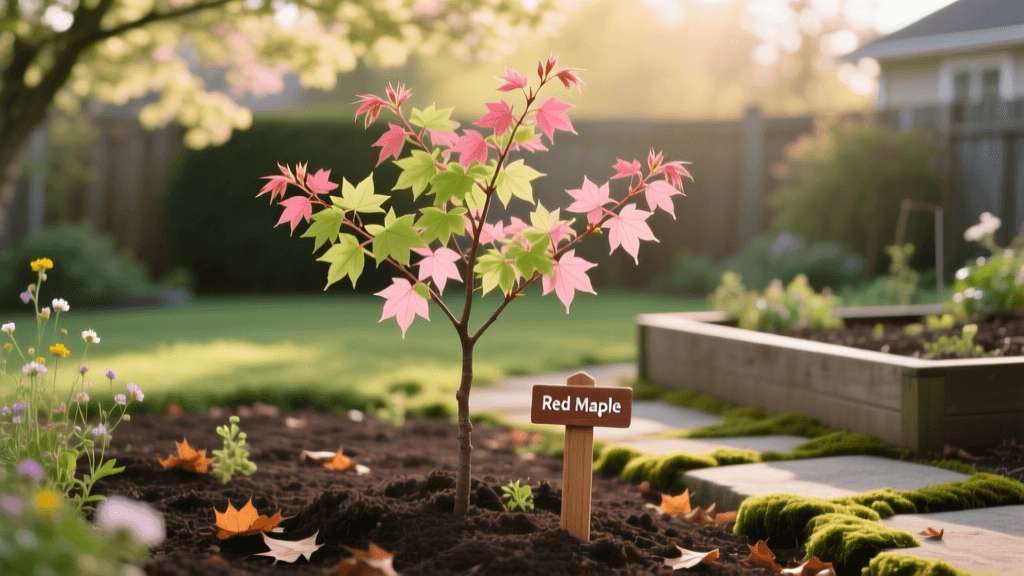
Selecting the Right Variety for Your Yard
Before you head to the nursery, it is crucial to understand that 'Japanese maple' is a broad term encompassing hundreds of cultivars. They generally fall into two main categories: upright growers and weeping (dissectum) laceleaf varieties. Upright varieties can reach 15 to 25 feet in height, making them ideal for shade or focal points, while weeping varieties typically max out at 4 to 8 feet and are perfect for planting near water features or in large containers. When purchasing, expect to pay between $50 and $150 for a healthy 5-gallon specimen, while larger 15-gallon trees can cost upwards of $300.
Popular Japanese Maple Varieties Compared
| Cultivar Name | Growth Habit | Mature Size (H x W) | Foliage Color | Best Use Case |
|---|---|---|---|---|
| Bloodgood | Upright, Rounded | 15-20 ft x 15 ft | Deep burgundy-red | Classic focal point, partial shade |
| Coral Bark (Sango-kaku) | Upright, Vase-shaped | 20-25 ft x 20 ft | Light green to yellow | Winter interest (bright red bark) |
| Crimson Queen | Weeping, Laceleaf | 8-10 ft x 10 ft | Deep crimson | Water features, rock gardens |
| Emperor I | Upright, Broad | 10-15 ft x 15 ft | Dark purple-red | Smaller yards, late leaf-out |
Site Selection: Sunlight and Soil Requirements
The most common mistake beginners make with Japanese maples is planting them in the wrong location. In their native habitat, these trees often grow as understory trees, protected by the canopy of larger forest giants. Consequently, they prefer dappled sunlight or partial shade. While some red-leafed cultivars (like Bloodgood) can tolerate full sun in cooler climates (USDA Zones 5-6), they will require consistent moisture to prevent leaf scorch. In hotter climates (Zones 7-9), afternoon shade is absolutely mandatory to protect the delicate leaves from burning.
Soil drainage is equally critical. Japanese maples despise 'wet feet.' Heavy, waterlogged clay soil will quickly lead to root rot and the demise of the tree. The ideal soil is loamy, rich in organic matter, and slightly acidic, with a pH between 5.5 and 6.5. If you have heavy clay soil, do not simply amend the planting hole with compost, as this creates a 'bathtub' effect where water collects. Instead, plant the tree slightly elevated, or mound the soil 2 to 3 inches above the surrounding grade to ensure proper runoff.
Step-by-Step Planting Instructions
The best time to plant a Japanese maple is in the early spring after the last frost, or in the early fall at least six weeks before the ground freezes. Fall planting is often preferred as it allows the root system to establish without the stress of summer heat.
- Dig the Hole: Dig a hole that is two to three times wider than the nursery pot, but no deeper than the root ball itself. The root flare (where the trunk widens at the base) must sit slightly above the surrounding soil line.
- Prepare the Roots: Gently remove the tree from its container. If the roots are circling tightly, use a sterilized pruning saw or sharp knife to score the sides and bottom of the root ball in an 'X' pattern. This encourages outward root growth.
- Position the Tree: Place the tree in the center of the hole. Step back and look at it from multiple angles to ensure the best side is facing your primary viewing area.
- Backfill: Fill the hole with the native soil you dug out. Avoid adding heavy fertilizers or excessive compost directly into the backfill, as this can burn tender new roots and discourage them from expanding into the native soil.
- Water Thoroughly: Use a garden hose to fill the hole with water, allowing it to drain completely to eliminate air pockets. Repeat this process twice.
Watering and Mulching for Success
Newly planted Japanese maples require consistent moisture to establish their root systems. For the first growing season, water deeply two to three times per week, depending on rainfall and temperature. A deep watering means letting a hose trickle at the base of the tree for 20 to 30 minutes, ensuring the moisture penetrates at least 12 inches into the soil. Shallow, frequent sprinklings encourage weak surface roots that are prone to drought stress.
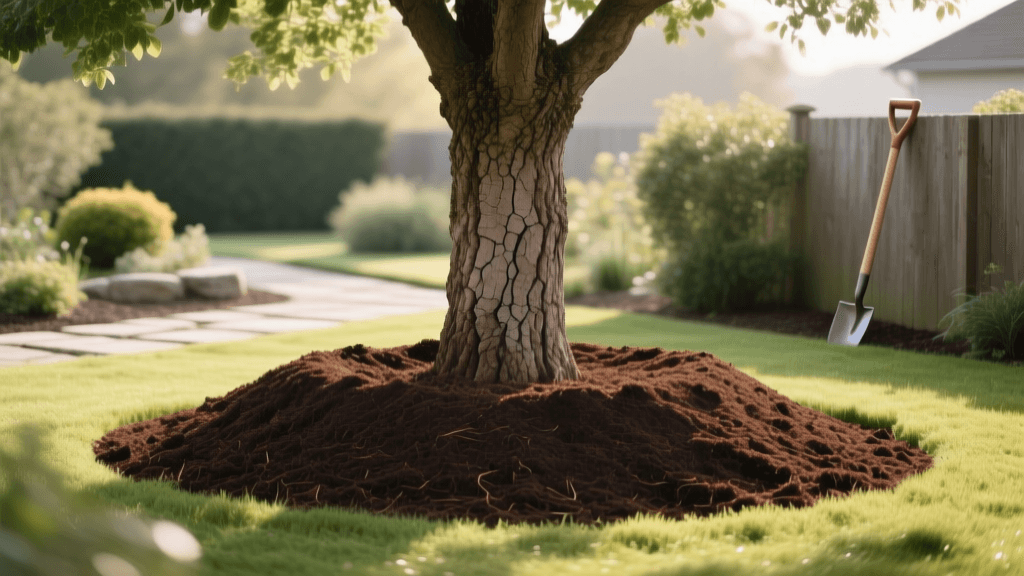
Mulching is non-negotiable for Japanese maples. Apply a 2 to 3-inch layer of organic mulch, such as shredded pine bark or hardwood mulch, in a 3-foot radius around the tree. Pine bark is excellent because it slowly breaks down and helps maintain the slightly acidic soil pH that maples prefer. Crucial Warning: Never let the mulch touch the trunk of the tree. Piling mulch against the bark (known as 'volcano mulching') traps moisture, invites fungal diseases, and provides a hiding spot for bark-gnawing rodents. Keep the mulch at least 3 inches away from the trunk.
Fertilizing Guidelines
Japanese maples are light feeders. Over-fertilizing can lead to rapid, weak growth that is highly susceptible to pests and wind damage. Avoid high-nitrogen synthetic fertilizers, which will turn your beautiful red or purple leaves a dull green. Instead, use a slow-release, acid-loving organic fertilizer. Espoma Holly-tone or **Miracle-Gro Water Soluble Azalea, Camellia, Rhododendron Plant Food** are excellent choices. Apply the fertilizer once a year in early spring, just as the buds begin to swell, following the package instructions for the specific size of your tree. Never fertilize a drought-stressed tree or fertilize late in the summer, as this will stimulate new growth that will be killed by the first winter frost.
Pruning Basics for Beginners
One of the greatest advantages of Japanese maples is that they require very little pruning to maintain their natural, elegant shape. For beginners, the golden rule is 'less is more.' Prune only to remove dead, diseased, or crossing branches that rub against each other. The best time to perform structural pruning is in late winter while the tree is fully dormant and the branch architecture is clearly visible without leaves in the way. Light shaping and the removal of small, leafy twigs can be done in late spring or early summer. Always use sharp, sterilized bypass pruners, and make clean cuts just outside the branch collar to promote rapid healing.
Troubleshooting Common Pests and Diseases
While generally hardy, Japanese maples can occasionally fall victim to specific issues:
- Leaf Scorch: Characterized by crispy, brown edges on the leaves. This is an environmental issue caused by too much sun, insufficient water, or harsh winds. Remedy by adjusting watering habits and providing temporary shade cloth during heatwaves.
- Aphids: These tiny, sap-sucking insects often cluster on new spring growth. They secrete a sticky substance called honeydew, which can lead to sooty mold. Treat minor infestations with a strong blast of water from the hose, or apply Neem Oil or insecticidal soap in the early evening.
- Verticillium Wilt: A devastating soil-borne fungal disease that causes sudden wilting and death of entire branches. There is no cure. Prevention is the only strategy; ensure excellent drainage and avoid planting in areas where previous susceptible plants have died.
Expert Insights on Tree Health
According to the Clemson University Cooperative Extension (Home & Garden Information Center), 'Japanese maples are relatively trouble-free when planted in the proper site. The most common cause of decline is poor drainage leading to root rot, or planting in heavy, unamended clay soils. Ensuring a slightly elevated planting site and maintaining a consistent mulch ring are the most effective cultural practices for long-term tree health.' (Source: Clemson HGIC 1016 - Japanese Maple).
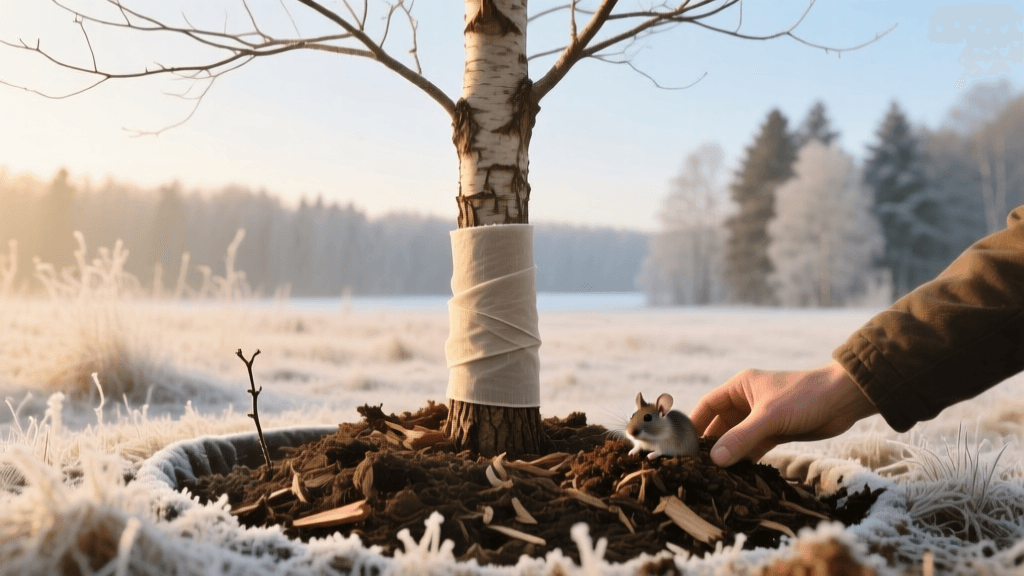
Winter Protection for Young Trees
In zones that experience harsh, freezing winters and heavy snowfall, young Japanese maples (under three years old) benefit from winter protection. The delicate branches of weeping laceleaf varieties can easily snap under the weight of wet snow. Gently brush off snow accumulations with a broom, brushing upward to avoid snapping the wood. For upright varieties in exposed, windy areas, consider wrapping the trunk with a commercial tree wrap or burlap to prevent 'sunscald' and frost cracking, which occurs when the winter sun warms the bark during the day and freezing temperatures rapidly cool it at night. Remove any wraps in early spring to prevent moisture buildup and pest harboring.
Final Thoughts
Planting a Japanese maple is a long-term investment in the beauty and tranquility of your landscape. By carefully selecting the right cultivar for your climate, prioritizing soil drainage, and adhering to a consistent watering and mulching regimen, you will set your tree up for decades of success. Remember that patience is key; Japanese maples grow slowly, but the breathtaking display of their spring foliage, summer shade, and brilliant autumn colors make every ounce of effort entirely worthwhile.