
Landscaping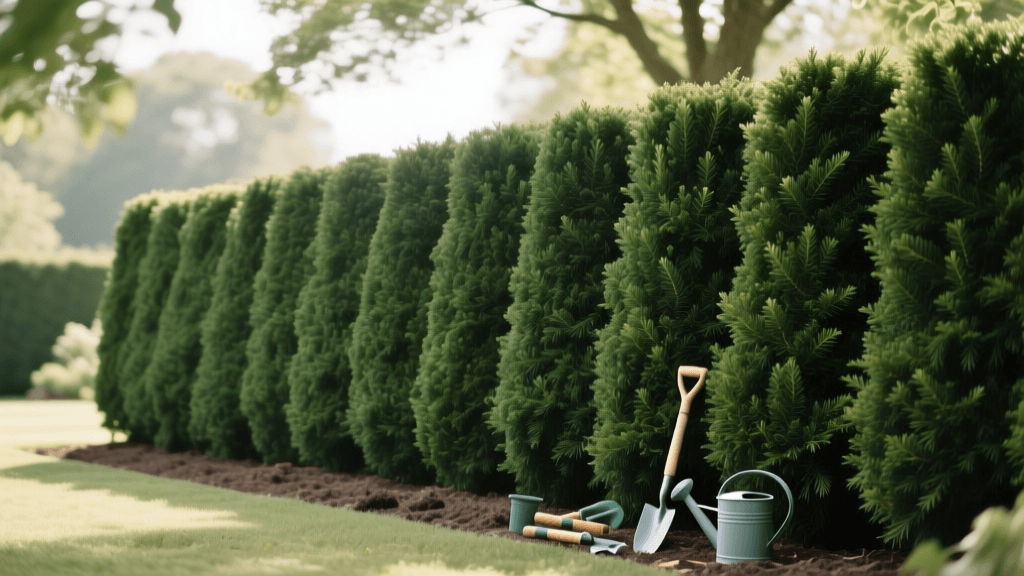
Beginner's Guide to Growing a Thuja Green Giant Hedge
Introduction to the Thuja Green Giant
Landscaping your property for privacy, wind protection, and curb appeal is a rewarding endeavor, but it can feel overwhelming for beginners. Fences are expensive, require ongoing maintenance, and often necessitate municipal permits, making living screens an attractive, eco-friendly alternative. Among the myriad of evergreen options available at your local nursery, the Thuja Green Giant (Thuja standishii x plicata 'Green Giant') stands out as the undisputed champion for beginner gardeners and seasoned landscape architects alike. This comprehensive, beginner-friendly growing guide will walk you through everything you need to know to successfully plant, grow, and maintain a lush, fast-growing privacy hedge that will transform your outdoor living space in just a few short years.
Why Choose the Thuja Green Giant for Your Landscape?
Before breaking ground, it is essential to understand why this specific cultivar is highly recommended by horticulturists. The Green Giant is a hybrid cross between the Japanese arborvitae and the Western redcedar. This genetic combination results in a tree that exhibits hybrid vigor, meaning it grows faster, resists diseases better, and tolerates a wider range of environmental conditions than its parent species.
- Explosive Growth Rate: Under optimal conditions, these trees can grow three to five feet per year, providing near-instant privacy compared to slower-growing alternatives like yews or hemlocks.
- Disease and Pest Resistance: Unlike the Leyland Cypress, which is prone to devastating fungal cankers and bagworms, the Green Giant boasts remarkable resistance to most common landscape pests and diseases.
- Deer Tolerance: While no plant is entirely deer-proof, the Green Giant is highly resistant to deer browsing, making it ideal for rural and suburban edges where foraging is common.
- Low Maintenance: Once established, these evergreens require minimal pruning and naturally maintain a dense, pyramidal shape without constant shearing.
Planning Your Hedge: Spacing and Layout
The most common mistake beginners make when planting a privacy hedge is improper spacing. Planting trees too closely together leads to severe competition for water, nutrients, and sunlight, ultimately stunting growth and encouraging fungal diseases due to poor air circulation. Conversely, planting them too far apart leaves gaps that take years to fill, defeating the purpose of a quick privacy screen.
When planning your layout, always call your local utility locating service (such as 811 in the United States) at least a few days before digging to ensure you do not strike underground gas, water, or electrical lines. Furthermore, check your local property line setbacks to ensure your mature hedge will not encroach on your neighbor's property or violate municipal easement rules.
Spacing Guide for Thuja Green Giants
| Desired Privacy Level | Spacing (Center to Center) | Estimated Time to Full Privacy | Best Use Case |
|---|---|---|---|
| Dense, Fast Screen | 5 to 6 feet | 2 to 3 years | Tight urban yards, immediate noise and visual buffering. |
| Standard Privacy Screen | 8 to 10 feet | 4 to 5 years | Suburban property lines, balancing growth speed with long-term tree health. |
| Windbreak or Rural Border | 12 to 15 feet | 6 to 8 years | Large acreage, farm perimeters, and heavy wind deflection. |
Step-by-Step Planting Guide
Planting your hedge correctly from day one is the single most important factor in ensuring long-term vigor. Follow these steps for a successful installation.
Step 1: Timing and Site Preparation
The best time to plant your Thuja Green Giants is in the early spring, after the last hard frost, or in the early fall, at least six weeks before the ground freezes. Fall planting is often preferred in warmer climates (USDA Zones 7-8) as it allows the root system to establish in the cool, moist soil before the stress of summer heat. Clear the planting area of all weeds, grass, and debris. A clean bed reduces competition for water and nutrients. You can use a string line stretched between two wooden stakes to ensure your planting trench is perfectly straight.
Step 2: Digging the Holes
Do not dig a narrow, deep hole. Tree roots grow outward, not straight down. Dig a hole that is twice as wide as the nursery pot but no deeper than the root ball itself. The root flare—the point where the trunk widens at the base and meets the roots—must sit slightly above or exactly at the grade of the surrounding soil. Planting too deeply is a primary cause of transplant shock, root girdling, and fatal root rot.
Step 3: Soil Amendment and Backfilling
Native soil is usually best for backfilling, as it encourages roots to expand outward rather than staying confined in a pocket of rich potting mix. However, if your soil is heavy clay or extremely sandy, amend the backfill with organic compost at a ratio of 70 percent native soil to 30 percent compost. Avoid using peat moss, which can dry out and become hydrophobic, and never add synthetic fertilizers directly into the planting hole, as this can burn tender new roots.
Step 4: Watering and Mulching
Immediately after backfilling, water the hole deeply to eliminate hidden air pockets. Apply a two to three-inch layer of organic mulch, such as shredded hardwood bark or pine needles, around the base of the tree. Keep the mulch pulled back at least three inches from the trunk to prevent moisture buildup, which can invite fungal pathogens and rodent damage during the winter months.
Watering and Fertilizing Schedule
Establishing a robust root system requires consistent moisture during the first two growing seasons.
Year 1: The Establishment Phase
- Watering: Provide 1 to 1.5 inches of water per week. Use a soaker hose or drip irrigation system laid along the base of the hedge for slow, deep watering that reaches the bottom of the root zone.
- Fertilizing: Do not fertilize at the time of planting. Wait until the following early spring, then apply a slow-release, balanced granular fertilizer (such as a 10-10-10 or 14-14-14 NPK ratio) at a rate of one cup per inch of trunk diameter.
Year 2 and Beyond: The Growth Phase
- Watering: Once established, Green Giants are moderately drought-tolerant. However, during prolonged summer dry spells, provide a deep watering once every ten days to prevent the inner needles from browning and dropping prematurely.
- Fertilizing: Apply an evergreen-specific fertilizer (higher in nitrogen, such as a 12-6-6 NPK) in early spring just as the new growth begins to emerge. Avoid fertilizing in late summer or fall, as this stimulates tender new growth that will be killed by winter frosts.
Pruning and Maintenance
One of the greatest advantages of the Thuja Green Giant is its natural, uniform pyramidal habit. Unlike other hedging plants that require monthly shearing, the Green Giant only needs light, annual maintenance. In late summer or early fall, after the main flush of growth has slowed, you can lightly shear the top and sides to encourage dense, bushy lateral branching. Never cut back into the old, brown, inner wood (the 'dead zone'), as arborvitae species do not regenerate foliage from bare branches. Always use sharp, sterilized bypass pruning shears or gas-powered hedge trimmers to make clean cuts that heal quickly and resist disease.
Winter Care and Troubleshooting
In northern climates (USDA Zones 5 and 6), heavy snow and ice accumulation can splay the multiple leaders of the tree, causing permanent structural damage. To prevent this, you can wrap the hedge loosely with jute burlap or use soft arborist ties to secure the central leaders together before the first major snowstorm. If you notice the inner needles turning brown and dropping in the autumn, do not panic. This is a natural process called seasonal needle drop, where the tree sheds its oldest, least efficient foliage to conserve energy for the winter.
However, if the outer, green tips are browning, you may be dealing with winter desiccation (windburn), root rot from poor drainage, or spider mites. According to the Clemson University Home & Garden Information Center (HGIC), ensuring adequate soil moisture going into the winter and applying an anti-desiccant spray in late November can significantly reduce winter windburn on evergreen privacy screens. Proper soil drainage is also paramount; if water pools around the base of your hedge for more than 24 hours after a rainstorm, you may need to install a French drain or regrade the landscape to protect the root systems from suffocation.
Conclusion
Installing a Thuja Green Giant privacy hedge is one of the most impactful and cost-effective landscaping projects a beginner can undertake. By carefully planning your spacing, planting at the correct depth, and adhering to a consistent watering schedule during the critical first year, you will cultivate a towering, emerald-green living fence. Not only will this hedge provide the privacy and tranquility you desire for your outdoor living space, but it will also serve as a valuable windbreak, a noise barrier, and a crucial habitat for local songbirds for decades to come.

