
Tree Care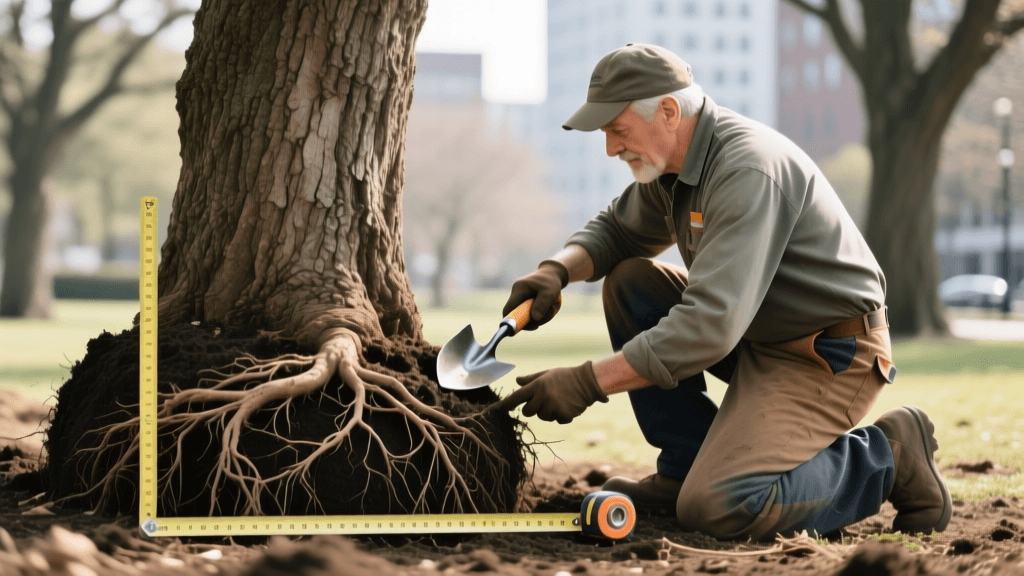
2026 Photo Guide: Mature Tree Root Pruning & Ball Ratios
The Intersection of Arboriculture and Visual Documentation
Transplanting a mature tree is one of the most complex, high-stakes operations in modern landscaping and garden preservation. In 2026, the intersection of arboriculture and garden documentation has evolved far beyond simple before-and-after snapshots. Today, landscape photographers and botanical archivists play a critical role in the transplanting process by visually documenting root pruning techniques, verifying root ball size ratios, and creating permanent visual records for certified arborists. This meticulous photographic documentation ensures accountability, aids in post-transplant health monitoring, and provides invaluable data for future horticultural research.
When dealing with mature specimens, the margin for error is virtually zero. A poorly calculated root ball or a crushed structural root can lead to transplant shock, canopy dieback, or total tree failure within a single growing season. By treating the root pruning and ball-sizing process as a subject of rigorous photographic study, we can capture the hidden, below-ground architecture that dictates the tree's survival. This guide outlines the professional workflow for documenting mature tree root pruning and ball size ratios using the latest 2026 photographic and LiDAR technologies.
Decoding the Root Ball Ratio: 2026 Standards
Before picking up a camera, a documentation specialist must understand the mathematics of tree survival. The industry standard for transplanting mature trees relies on a strict ratio between the trunk caliper (measured at breast height or just above the root flare) and the diameter of the excavated root ball. According to the University of Minnesota Extension, the general rule of thumb requires 10 to 12 inches of root ball diameter for every 1 inch of trunk caliper. However, in 2026, many arborists advocate for the more conservative 12-inch ratio for older, slower-growing species to maximize the retention of vital feeder roots.
Documenting this ratio visually requires more than just a wide shot of a hole in the ground. It demands precise scale markers, specific lighting angles to highlight the soil profile, and macro photography to inspect the severed root ends. The goal is to prove, via visual evidence, that the excavated ball meets the biological requirements of the specific species being moved.
Visualizing the Math: Root Ball Sizing Chart
The following table serves as a quick-reference guide for photographers and arborists to determine the necessary scale markers and estimated weights for documenting various tree sizes. Use this chart to prepare your staging equipment before the excavation begins.
| Trunk Caliper (inches) | Min Root Ball Diameter (inches) | Estimated Ball Weight (lbs) | Recommended Photo Scale Marker |
|---|---|---|---|
| 2 | 24 | 800 | 24-inch Color Calibration Bar |
| 3 | 36 | 1,800 | 36-inch Standard Yardstick |
| 4 | 48 | 3,200 | Dual 24-inch Bars (Crossed) |
| 5 | 60 | 5,000 | LiDAR 3D Scan + 60-inch Tape |
| 6+ | 72+ | 8,500+ | Photogrammetry Grid + Scale Rod |
The Photographer’s Workflow: Documenting the Three Phases
Phase 1: Trunk Caliper and Pre-Trenching Assessment
The documentation process begins long before the spades hit the dirt. Phase 1 involves capturing the baseline metrics of the tree. Using a 100mm macro lens, photograph the trunk caliper measurement. Ensure the D-tape (diameter tape) is pulled taut and positioned exactly at the standard measurement height. Capture the bark texture, any existing signs of stress, and the root flare. These initial images establish the biological baseline. In 2026, it is standard practice to embed GPS metadata and timestamp the RAW files immediately to create an unalterable chain of custody for the tree's health records.
Phase 2: Trenching, Root Pruning, and Cross-Section Macro
Root pruning is often performed six to twelve months prior to the actual transplant to encourage the growth of new, fibrous feeder roots within the designated ball. When the trench is dug, the photographer's job is to document the quality of the root cuts. The Clemson University Home & Garden Information Center emphasizes that clean, sharp cuts heal rapidly and generate new root mass, whereas crushed or torn roots invite fungal pathogens and rot.
Position your camera on a low-angle tripod or use an articulating screen to get parallel to the severed root ends. Use a macro lens to capture the cross-sections of the larger structural roots. You are looking for clean cambium layers. If you document crushed roots, these images serve as vital evidence to adjust the crew's equipment—such as switching from a standard trencher to a sharp, hand-held pruning saw for the final cuts. Place a standard 18% grey card and a color checker passport next to the largest severed root to ensure accurate color and exposure representation in post-processing.
Lighting the Trench: Overcoming Below-Grade Shadows
Trenches are notoriously difficult to photograph due to harsh overhead sunlight creating deep, impenetrable shadows at the bottom of the excavation. To properly document the root ball ratio and the quality of the pruning cuts, you must bring your own light. In 2026, portable, high-output LED panels, such as the Aputure Amaran series, are essential gear for the garden documentarian. Bounce a soft, daylight-balanced LED light off a white reflector held at ground level to illuminate the trench walls evenly. This reveals the intricate web of fine roots and the distinct soil horizons, providing a rich, detailed image that flat, direct flash simply cannot achieve.
Phase 3: 3D Mapping and Final Ball Verification
Once the root ball is fully undercut and shaped into the required spherical or tapered form, the final verification begins. While traditional photography with a wide-angle lens (e.g., 16-35mm) is necessary to show the overall scale of the ball against the surrounding landscape, 2026 documentation relies heavily on LiDAR and photogrammetry. Using modern LiDAR-equipped tablets or smartphones paired with advanced scanning applications like Polycam, photographers can create a millimeter-accurate 3D mesh of the root ball.
This 3D model allows remote arborists to measure the exact diameter, depth, and volume of the root ball without stepping foot on the property. It also provides a permanent, interactive record of the root structure before it is wrapped in burlap and wire. When capturing the final ball, ensure your scale markers are highly visible—neon orange or high-visibility yellow measuring tapes draped across the top and sides of the ball provide immediate visual confirmation of the ratio.
Archiving Your Visual Data for Long-Term Health Tracking
The value of documenting root pruning and ball size ratios extends far beyond the day of the transplant. By organizing your visual data into a structured digital archive, you create a powerful tool for post-transplant care. Store your RAW files, 3D LiDAR scans, and metadata logs in a cloud-based botanical database. Tag each image set with the tree's species, the exact date of pruning, the soil composition observed in the trench, and the final root ball dimensions.
When the tree experiences environmental stress in subsequent years, arborists can refer back to your 2026 documentation to see exactly which roots were severed, how the ball was proportioned, and whether the initial trenching depth was adequate. As noted by the Arbor Day Foundation, proper planting and transplanting techniques are the foundation of a tree's long-term urban survival. By elevating garden photography from mere aesthetics to rigorous scientific documentation, we provide the critical visual data necessary to ensure these mature giants thrive in their new environments for decades to come.

