
Gardening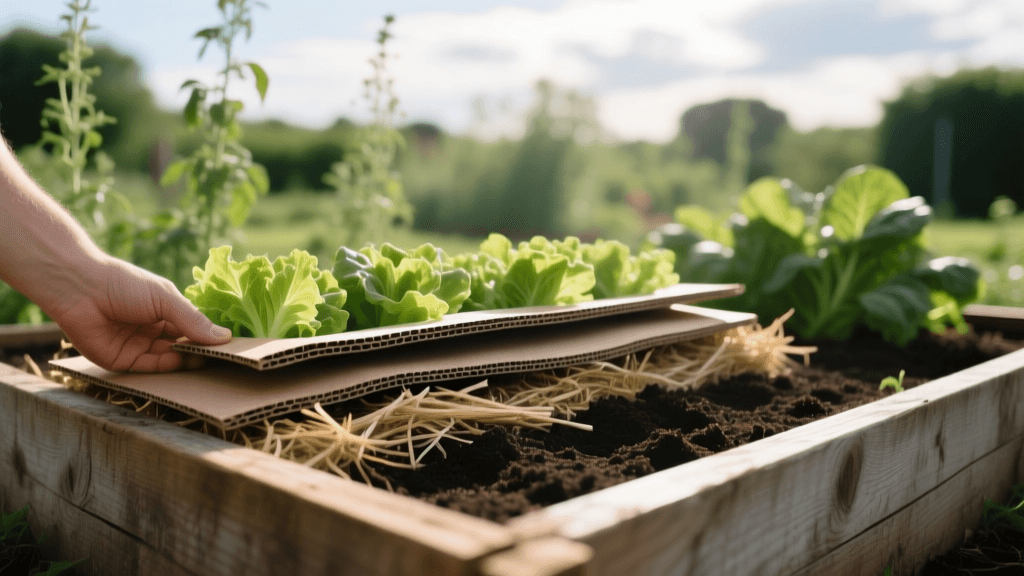
Viral No-Dig Lasagna Gardening: Build Instant Beds
If you have spent any time on TikTok, Instagram Reels, or YouTube Shorts lately, you have likely seen the viral "lazy gardening" trend taking over the homesteading and plant communities. Dubbed "lasagna gardening" or "sheet mulching," this no-dig method promises instant, weed-free raised beds without the backbreaking labor of tilling or the massive expense of building wooden planter boxes. But is this viral hack actually rooted in solid horticultural science, or is it just another internet fad? As it turns out, no-dig gardening is a time-tested permaculture technique that is finally getting the mainstream attention it deserves.
Why No-Dig Lasagna Gardening is Going Viral
The appeal of lasagna gardening lies in its accessibility and its profound benefits for soil health. Traditional rototilling destroys the delicate soil food web, severs beneficial mycorrhizal fungal networks, and brings dormant weed seeds to the surface. By contrast, the no-dig method mimics the natural decomposition process of a forest floor. According to extensive research highlighted by the Rodale Institute, no-till and no-dig practices drastically improve soil water retention, increase organic matter, and sequester carbon.
Furthermore, viral gardening influencers have demonstrated that you can transform a patch of weedy lawn into a highly productive vegetable bed in a single afternoon. For urban homesteaders and suburban gardeners dealing with poor native soil, compacted clay, or invasive grasses like Bermuda, sheet mulching offers a rapid, cost-effective solution. Master gardener and no-dig pioneer Charles Dowding has spent decades proving that undisturbed soil produces higher yields with fewer pests and diseases, a philosophy that perfectly aligns with the modern gardener's desire for sustainable, low-maintenance food production.
Materials You Need (and What They Cost)
To build a standard 4-foot by 8-foot lasagna bed, you will need a balance of "brown" (carbon-rich) and "green" (nitrogen-rich) materials. Here is a practical breakdown of what to source and the estimated costs:
- Corrugated Cardboard (Free): Source from local appliance stores, grocery stores, or your own recycling bin. Avoid glossy, wax-coated, or heavily inked cardboard. Remove all plastic tape and staples.
- Bulk Compost ($35 - $50 per cubic yard): You will need about 1 cubic yard for the top layer. Sourcing from a local landscape supply yard is vastly cheaper than buying bagged compost from a big-box store.
- Straw or Seed-Free Hay ($8 - $12 per bale): You will need 2 to 3 bales for the carbon layer. Ensure it is straw (stalks) rather than hay (which contains seed heads that will sprout in your bed).
- Composted Manure or Grass Clippings ($15 - $20): A few bags of composted cow or poultry manure provide the nitrogen kick needed to break down the carbon layers.
- Total Estimated Cost: $60 to $90 for a 32-square-foot bed, which is a fraction of the $250+ it would cost to build and fill a traditional cedar raised bed.
Step-by-Step Guide to Building a Viral Lasagna Bed
Step 1: Mow and Smother
Do not pull up the existing grass or weeds. Simply mow the area as short as possible. Lay down your corrugated cardboard directly over the grass, ensuring that every piece overlaps by at least 6 inches. This overlap is crucial; it prevents aggressive weeds and rhizomatic grasses from finding a gap and pushing through. Once the cardboard is laid, thoroughly soak it with a hose (about 5 to 10 gallons of water). Wet cardboard breaks down faster and immediately signals to earthworms that a moist, hospitable environment awaits them above.
Step 2: The Nitrogen Layer (Green)
Spread a 1-to-2-inch layer of nitrogen-rich material directly onto the wet cardboard. This can be composted manure, fresh grass clippings (from an untreated lawn), or kitchen vegetable scraps. This layer acts as the "engine" that feeds the microbes responsible for breaking down the cardboard and straw above it.
Step 3: The Carbon Layer (Brown)
Add a 4-to-6-inch layer of straw, shredded autumn leaves, or pine needles. This bulky carbon layer provides aeration, retains moisture, and balances the high nitrogen of the previous layer. If you are building your bed in the fall, you can make this layer much thicker (up to 12 inches), as it will shrink significantly as it decomposes over the winter.
Step 4: The Planting Layer
Top the bed with 3 to 4 inches of high-quality finished compost. This is the layer where your plant roots will initially live. If you are planting immediately in the spring, this compost layer is non-negotiable, as the lower layers are still too "hot" and acidic for tender roots.
Lasagna Gardening Layer Comparison Chart
| Layer Type | Materials | Thickness | Primary Purpose |
|---|---|---|---|
| Base / Smother | Corrugated Cardboard | 1 sheet (overlapped) | Kills existing weeds, retains moisture |
| Nitrogen (Green) | Manure, Grass Clippings | 1 - 2 inches | Feeds soil microbes, accelerates decay |
| Carbon (Brown) | Straw, Shredded Leaves | 4 - 6 inches | Adds bulk, aerates, balances C:N ratio |
| Top / Planting | Finished Compost | 3 - 4 inches | Provides immediate nutrients for roots |
Timing Your Build: Fall vs. Spring
One of the most frequent questions surrounding the viral no-dig trend is when to build the bed. The absolute best time to construct a lasagna garden is in the autumn. By building your bed in October or November, you allow the winter rains, freezing, and thawing cycles to naturally break down the cardboard and straw. The earthworms will spend the winter pulling organic matter deep into the native soil, and by the time spring arrives, your bed will have settled into a rich, dark, loamy paradise ready for direct sowing.
However, if you are catching the gardening bug in the middle of April, you can still build and plant immediately. The key to spring building is ensuring your top compost layer is thick enough (at least 4 inches) to support transplants without their roots touching the actively decomposing, heat-generating layers below. When planting in a fresh spring bed, use a trowel to pull back the mulch, plant your starts directly into the compost, and then gently pull the straw back around the base of the plant to retain moisture.
Best Plants for First-Year No-Dig Beds
Because a newly built lasagna bed is incredibly rich in nutrients but may still be settling and decomposing, it is best suited for "heavy feeders" and transplants rather than direct-sown, delicate seeds.
- Tomatoes and Peppers: Plant these as transplants directly into the top compost layer. The rich, warm environment created by the decomposing layers below will supercharge their growth.
- Squash and Zucchini: These sprawling plants love the high nitrogen and will quickly shade out any opportunistic weeds that might try to establish on the edges of your bed.
- Potatoes: Seed potatoes can be placed right on top of the cardboard layer, then covered with the straw and compost. At harvest time, you simply pull back the decomposed mulch to reveal clean, perfectly formed tubers.
Avoid planting root vegetables like carrots or parsnips in the first year. The decomposing layers can be too loose or uneven, causing root crops to fork, split, or grow stunted. Save those for year two when the bed has fully integrated into a uniform soil profile.
Common Mistakes to Avoid
Even the most viral gardening hacks have a learning curve. To ensure your lasagna bed succeeds, avoid these common pitfalls:
- Using the Wrong Cardboard: Never use cardboard with glossy finishes, heavy colored inks, or wax coatings (often found on produce boxes). These contain microplastics and petrochemicals that will leach into your food supply.
- Walking on the Bed: The primary rule of no-dig gardening is to never compact the soil. Design your bed so it is no wider than 4 feet, allowing you to reach the center from either side without ever stepping on the growing medium.
- Neglecting the Edges: Weeds will inevitably try to creep in from the surrounding lawn. Maintain a 2-inch mulch buffer around the perimeter of your bed, or edge it with a shallow trench to sever encroaching grass rhizomes.
For more detailed insights on layering techniques and regional timing, Fine Gardening's comprehensive guide on lasagna gardening offers excellent regional adjustments for moisture and climate. By embracing this viral, science-backed method, you can bypass the hardest parts of garden prep and jump straight into the joy of growing your own food.

