
Tree Care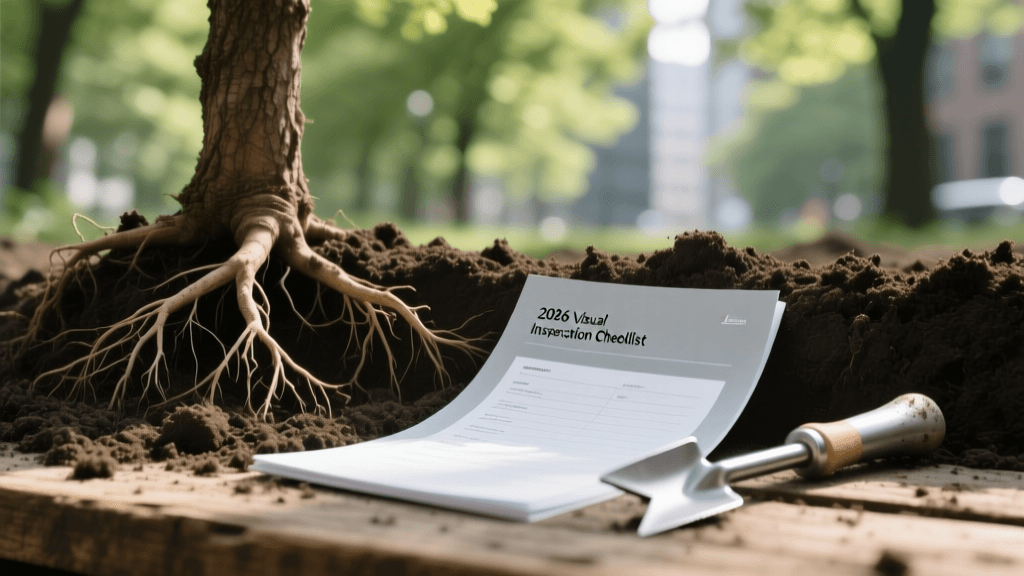
2026 Tree Health Inspection Checklist: Core Aeration Needs
The 2026 Tree Health Visual Inspection Protocol
As urban and suburban landscapes continue to evolve in 2026, soil compaction remains one of the most pervasive and silent killers of mature trees. While homeowners often focus on above-ground symptoms like wilting leaves or dying branches, the root cause frequently lies beneath the surface. A comprehensive tree health assessment must include a rigorous visual inspection checklist designed to identify soil compaction and determine when specialized tree core aeration is required. Unlike standard lawn aeration, which can sever vital surface roots, tree-specific core aeration requires precision, specialized techniques, and a deep understanding of the Critical Root Zone (CRZ). This guide provides a step-by-step visual inspection checklist to help you assess tree vitality and implement effective core aeration strategies.
Phase 1: Above-Ground Visual Inspection Checklist
Before examining the soil, you must evaluate the tree's canopy and foliage. Trees suffering from restricted oxygen and water uptake due to compacted soil will exhibit distinct above-ground distress signals.
Canopy and Foliage Assessment
- Dieback and Thinning: Look for dead twigs and branches, particularly in the upper third of the canopy. Thinning foliage is often the first sign that roots are suffocating.
- Leaf Chlorosis and Undersizing: Leaves that are unusually small, pale, or yellowing (chlorotic) indicate a lack of nutrient uptake. In 2026, advanced soil testing often correlates these visual signs with iron or manganese deficiencies exacerbated by poor soil gas exchange.
- Epicormic Sprouting: The sudden appearance of 'water sprouts' along the trunk or major branches is a stress response. The tree is attempting to generate new photosynthetic tissue because the existing canopy is failing due to root-zone hypoxia.
- Premature Fall Color or Leaf Drop: If your tree changes color or drops leaves in mid-summer, the root system is likely compromised and unable to support the canopy during peak transpiration periods.
Phase 2: Trunk and Root Flare Evaluation
The transition zone between the trunk and the soil is critical for diagnosing long-term health issues. According to Trees Are Good, an initiative by the International Society of Arboriculture, inspecting the root flare is mandatory for any thorough health assessment.
Root Flare and Bark Inspection
- Buried Root Flare: The trunk should flare outward at the base, resembling a bell. If the trunk goes straight into the ground like a telephone pole, the tree is planted too deeply or grade changes have buried the flare, severely restricting oxygen.
- Girdling Roots: Look for roots wrapping around the trunk base. These strangle the tree's vascular system and are often a secondary symptom of compacted, impermeable soils forcing roots to grow laterally near the surface.
- Fungal Fruiting Bodies: The presence of mushrooms, conks, or fungal mats at the base of the trunk indicates internal decay, often accelerated by poor drainage and compacted soils that trap excess moisture against the bark.
Phase 3: Soil Surface and Compaction Diagnostics
This is where the decision for core aeration is made. Soil compaction destroys soil structure, collapsing the pore spaces necessary for water infiltration and gas exchange. The Morton Arboretum notes that compacted soils can reduce tree growth rates by up to 50% and significantly increase susceptibility to secondary pests.
Visual and Physical Soil Indicators
- Water Pooling and Runoff: After a moderate rainstorm, observe the root zone. If water pools on the surface or runs off into the street rather than infiltrating, the soil is heavily compacted.
- Surface Crusting and Cracking: Bare soil that forms a hard crust or develops deep cracks when dry lacks organic matter and has a destroyed granular structure.
- Lack of Understory Growth: If grass, groundcovers, or weeds refuse to grow under the tree's dripline, the soil is likely too dense and oxygen-deprived to support even shallow-rooted plants.
- The Screwdriver Test: Push a standard 6-inch screwdriver into the soil. If you cannot easily push it in to the handle using moderate hand pressure, the soil is critically compacted and requires immediate aeration.
Tree-Specific Core Aeration: Techniques for 2026
It is vital to understand that standard lawn core aerators (pluggers) should never be used over a tree's structural root zone. The heavy machinery crushes surface roots, and the shallow tines fail to reach the deeper absorption roots. In modern arboriculture, 'core aeration' for trees refers to specialized techniques like Vertical Mulching and Radial Trenching.
Vertical Mulching (Core Extraction)
This involves using a specialized 2-inch to 3-inch auger to extract cores of soil 12 to 18 inches deep within the dripline. The extracted cores are removed, and the holes are backfilled with a porous mixture of biochar, expanded shale, and coarse compost. This creates permanent vertical channels for air and water to reach the deeper root profile without severing major structural roots.
Radial Trenching (AirSpade Excavation)
For severely compacted sites, arborists use compressed-air tools (like the AirSpade) to safely excavate narrow, spoke-like trenches radiating from the trunk outward. The compacted soil is removed and replaced with a high-quality engineered soil blend. As highlighted by Penn State Extension, radial trenching is one of the most effective methods for revitalizing declining mature trees in urban environments.
2026 Core Aeration Symptom and Solution Matrix
Use the following table to match your visual inspection findings with the appropriate core aeration intervention.
| Visual Symptom | Compaction Severity | Recommended Core Aeration Method | Backfill Material |
|---|---|---|---|
| Mild canopy thinning, slow water infiltration | Moderate | Vertical Mulching (2-inch auger cores, 12' deep) | Coarse compost and biochar mix |
| Severe dieback, surface water pooling, crusty soil | Severe | Radial Trenching via AirSpade excavation | Engineered structural soil or expanded shale |
| Chlorotic leaves, buried root flare | Severe + Grade Issue | Root Crown Excavation combined with vertical coring | Arborist wood chips and coarse sand |
| Epicormic sprouting, hard surface (fails screwdriver test) | Moderate to Severe | Hydro-coring (high-pressure water injection coring) | Liquid humic acid and porous ceramic grit |
Step-by-Step Execution Guide for Vertical Core Aeration
If your visual inspection dictates that vertical mulching (core extraction) is the best path forward, follow these actionable steps to ensure tree safety and maximum soil remediation.
- Map the Critical Root Zone (CRZ): Measure the trunk diameter at 4.5 feet high (DBH). Multiply this number by 12 to find the radius of your CRZ in inches. Focus your aeration efforts from just outside the trunk flare to the edge of the dripline.
- Locate Utilities: Always call your local utility marking service before drilling or trenching to avoid striking underground gas, water, or fiber-optic lines.
- Extract the Cores: Using a gas-powered or heavy-duty battery-operated 2-inch auger, drill holes 12 to 18 inches deep. Space the holes 18 to 24 inches apart in a grid or concentric circle pattern. Avoid drilling within 3 feet of the trunk to protect the root collar.
- Mix the Amendment: Combine 40% coarse compost, 40% expanded shale or perlite, and 20% horticultural biochar. This specific 2026-approved blend ensures long-term pore space retention and microbial activity.
- Backfill and Cap: Fill each hole with the amendment mixture, leaving the top 2 inches empty. Cap the top with natural arborist wood chips to prevent the pores from clogging with surface silt and to retain moisture.
Post-Aeration Care and Monitoring
Core aeration is a stress-inducing procedure, even when done correctly. Following the intervention, the tree will need dedicated aftercare. Apply a 2-to-3-inch layer of organic mulch over the entire treated area, keeping it strictly away from the trunk bark to prevent rot. Water the tree deeply and slowly using a soaker hose or drip irrigation system to help the new backfill materials settle and to encourage roots to migrate into the newly created oxygen-rich channels. Re-assess the canopy density and leaf color in the following spring to gauge the success of the aeration treatment. By combining a rigorous visual inspection checklist with targeted, tree-safe core aeration, you can effectively reverse soil compaction and extend the lifespan of your most valuable landscape assets.

