
Gardening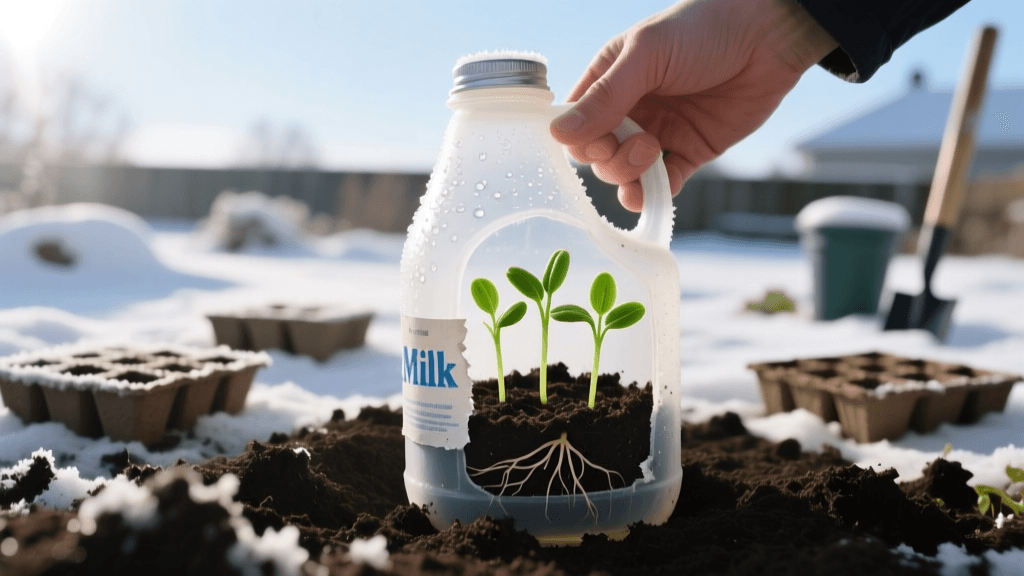
Viral Winter Sowing Hack: Grow Seedlings in Milk Jugs
The Viral Milk Jug Hack Taking Over Gardening Social Media
Every January, gardening communities on TikTok, Instagram, and Pinterest explode with a peculiar sight: hundreds of translucent plastic milk jugs sitting out in the freezing snow. This isn't recycling day; it is the highly effective, incredibly viral 'winter sowing' method. For gardeners looking to save hundreds of dollars on nursery transplants and avoid the chaos of indoor grow lights, this hack is a game-changer. By repurposing gallon-sized plastic jugs as miniature outdoor greenhouses, you can harness the natural freezing and thawing cycles of winter to germinate cold-hardy vegetables, native perennials, and hardy annuals.
According to the master gardeners at WinterSowing.org, this method mimics nature's own seed dispersal timeline. Seeds drop in the autumn, endure the winter chill, and sprout exactly when the spring soil temperatures are safe. In this comprehensive guide, we will break down the science, the exact measurements, and the step-by-step process to master this trending viral gardening hack.
The Science: Why Mini-Greenhouses Work
Many seeds, particularly native perennials, cold-hardy greens, and certain herbs, possess built-in germination inhibitors. In nature, these inhibitors prevent seeds from sprouting during a brief, unseasonably warm spell in late autumn, which would inevitably kill the seedling when winter returns. To break this dormancy, seeds require 'cold stratification'—a prolonged period of cold, moist conditions.
As noted by Penn State Extension, winter sowing provides this exact environment. The milk jug acts as a cold frame. It traps ambient moisture and protects the soil from drying winds and heavy snow loads, while still allowing the seeds to experience the necessary freezing temperatures. When spring arrives, the jug warms up rapidly in the sun, triggering germination. Because the seedlings are already growing outdoors, they are naturally hardened off, completely eliminating the risk of transplant shock that plagues indoor-started seedlings.
Materials Needed (Total Cost: Under $15)
You likely have most of these items in your home right now. If not, they are easily sourced from any hardware or garden store.
- Translucent Gallon Jugs: Save your milk, water, or vinegar jugs. Avoid opaque jugs (like orange juice) as light is required for germination. You need 1 jug per seed variety.
- Seed Starting Mix: Do not use garden soil or heavy potting soil. Use a sterile, lightweight seed starting mix (e.g., Espoma Organic Seed Starter or Miracle-Gro Seed Starting Mix).
- Utility Knife or Heavy Scissors: For cutting the plastic.
- Soldering Iron or Heated Nail: For melting perfectly round drainage holes.
- Outdoor Duct Tape: Standard tape will fail in freezing rain. Use heavy-duty, weather-resistant duct tape.
- Oil-Based Paint Pens or Garden Labels: Standard markers will fade in the UV sunlight within weeks.
Step-by-Step: Building Your Milk Jug Greenhouse
Step 1: Prep and Cut the Jug
Rinse your gallon jug thoroughly to remove any milk residue, which can harbor mold and bacteria. Remove the cap and discard it; you will not need it. Using your utility knife, pierce the plastic about four inches up from the base, right below the handle. Cut horizontally around the jug, but stop about one inch before you complete the circle on the hinge side (the side opposite the handle). This uncut inch acts as a flexible hinge, allowing you to open and close the jug like a clamshell.
Step 2: Add Drainage and Soil
Drainage is non-negotiable. If water pools in your jug, your seeds will rot. Use a heated nail or soldering iron to melt four to six quarter-sized holes in the bottom of the jug. Next, add 3 to 4 inches of your pre-moistened seed starting mix. The soil should feel like a wrung-out sponge—damp, but not dripping wet. According to University of Minnesota Extension, pre-moistening the soil before sowing prevents the dry peat from repelling water and displacing tiny seeds.
Step 3: Sow and Seal
Sprinkle your seeds evenly across the soil surface. For tiny seeds like snapdragons or lettuce, simply press them into the surface. For larger seeds like kale or spinach, cover them with 1/4 inch of soil. Mist the surface gently with a spray bottle. Close the jug lid and seal the cut seam securely with your weather-resistant duct tape. Label the jug clearly on the side and on a popsicle stick placed inside the soil.
The Ultimate Winter Sowing Calendar (Zones 3-8)
Timing is everything. You cannot sow warm-weather crops like tomatoes or peppers in milk jugs in January; they will rot. Stick to cold-hardy varieties. Use the chart below to plan your sowing schedule based on your average last spring frost date.
| Plant Category | Best Varieties to Winter Sow | When to Sow (Relative to Last Frost) | Cold Stratification Needed? |
|---|---|---|---|
| Hardy Perennials | Echinacea, Milkweed, Lavender, Columbine | 12-16 Weeks Before (Dec/Jan) | Yes (Required) |
| Cold-Hardy Greens | Spinach, Kale, Arugula, Swiss Chard | 8-10 Weeks Before (Feb) | No |
| Brassicas | Broccoli, Cabbage, Cauliflower, Brussels Sprouts | 8-10 Weeks Before (Feb) | No |
| Root Vegetables | Carrots, Radishes, Beets, Turnips | 6-8 Weeks Before (Late Feb/Mar) | No |
| Hardy Annual Flowers | Snapdragons, Sweet Peas, Calendula, Bachelor Buttons | 8-12 Weeks Before (Jan/Feb) | Yes (Beneficial) |
Viral Pro-Tips for Maximum Germination
To ensure your milk jug garden thrives, incorporate these tips favored by viral gardening influencers and master gardeners alike:
- The 'Bottom Watering' Trick: Once seedlings emerge, watering from the top can crush delicate stems. Instead, place your sealed jugs in a shallow plastic storage tote. Pour water directly into the bottom of the tote, allowing the jugs to wick moisture up through the drainage holes. This keeps the foliage dry and prevents fungal diseases.
- Venting in Late Spring:As daytime temperatures consistently reach 50°F (10°C) and above, your mini-greenhouses will start to cook the seedlings. You must vent them. Simply peel back the duct tape and prop the top half open with a popsicle stick, or cut a few slits near the top handle.
- The Root Ball Separation Hack:When it is time to transplant, do not pull seedlings by their stems. Cut the tape, remove the top of the jug, and gently slide the entire soil block out. Use a bread knife to slice the soil block into individual brownie-sized squares, planting each square directly into your garden beds.
Troubleshooting Common Issues
Even the best hacks have a learning curve. If you notice algae growing on the soil surface, your jugs are too wet and not getting enough airflow; ensure your drainage holes are clear and consider leaving the cap off entirely. If your seedlings look 'leggy' (tall and spindly), they are stretching for light. Ensure your jugs are placed in a location that receives full, direct sunlight for at least 6 to 8 hours a day, avoiding the shade cast by your home or fences.
Conclusion
The milk jug winter sowing hack is more than just a fleeting social media trend; it is a scientifically sound, budget-friendly, and highly rewarding method of propagation. By recycling household plastics and letting Mother Nature do the heavy lifting of cold stratification, you can cultivate a vibrant, resilient garden ready to explode with growth the moment spring arrives. Grab your utility knife, save your jugs, and start sowing!

